
Selective Focus and Tilt-Shift
In this Photoshop tutorial we will explore the basic technique and options for creating selective focus without the use of a macro lens or fast exposure and the Tilt-Shift effect created by large format cameras and 35mm cameras outfitted with a Tilt-Shift lens.Step 1
As the intro suggests, today I’m going to demonstrate a few related techniques to create selective focus. In the camera we would create selective focus by using a high shutter speed to ensure that only nearest the lens would be in crisp focus while everything else falls away into a soft-focus or even blur. With a Tilt-Shift lens, the frontal element can be moved horizontal and vertical, front and back while the other two focusing elements remain stationary allowing for the creation of a very specific linear selective focus that cannot be created otherwise (without the use of image editing tools like Photoshop).
I’m out of town surfing for a few weeks and away from my large hard drive which contains my photography so I resorted back to the iStockPhoto dollar bin and I found this rather strange shot. There are a lot of jokes I could tell about now, but I’ll hold back today and explain that I chose this photo for its relatively deep depth of field. Notice that both her fingers (closest to us) and her elbow (furthest from us) are in focus. The clear focus through the whole subject will allow me to clearly demonstrate these techniques, if you can keep from being distracted by the creepy girl with the zipper in her armpit.

Step 2
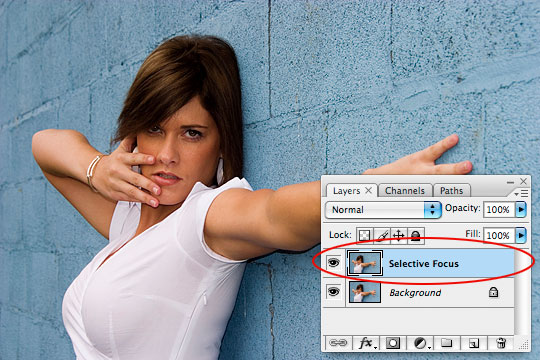
Because we always want to keep some part of this poor girl in focus, lets begin by duplicating the Background layer by pressing Command-J (PC: Ctrl-J) and calling it Selective Focus. (*note: If your Layers palette isn’t visible choose Window>Layers from the main menu to open it.)
Step 3
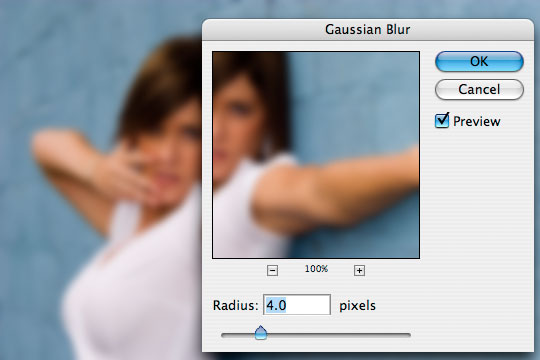
Now I’m going to blur the duplicated layer by choosing Filter>Blur>Gaussian Blur from the main menu. I’m working at 72ppi so a setting of 4 will work nicely for me but if you’re working with a larger image, you may want to increase the number until the blur looks right to you.
Step 4
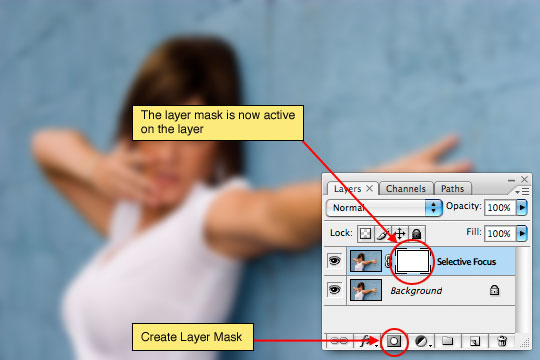
Because we only want certain areas of this blurred layer to be visible, lets add a Layer Mask by clicking the Create Layer Mask icon at the bottom of the Layers palette.
Step 5
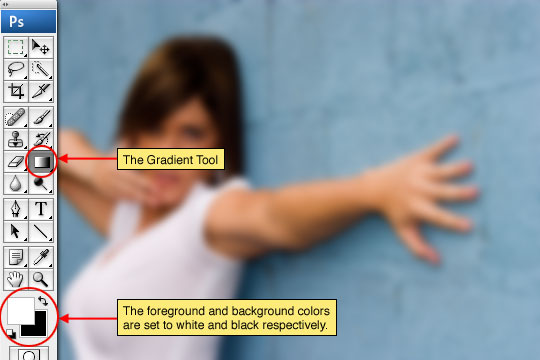
Switch to the Gradient tool by pressing the G key, then press the D key to reset the foreground and background colors to black and white. Pressing the X key now will switch the foreground and background swatches making black the foreground and white the background colors.
Step 6
Now lets set the options in the Gradient options bar at the top of Photoshop. I want you to pay attention here, because in each variation in this tutorial we will be changing settings in this options bar.
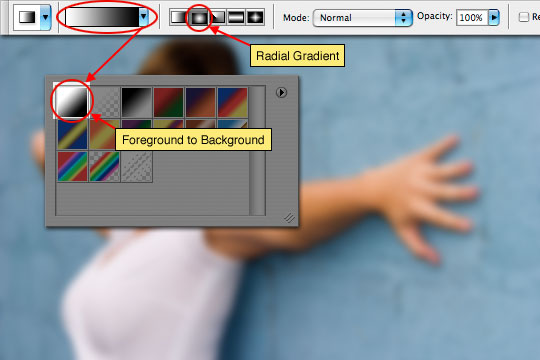
Click on the drop-down arrow next to the gradient selector and choose the swatch labeled Foreground to Background (which by default is the first swatch in the menu unless you’ve modified your swatches), then press the Radial Gradient icon to select it as shown below.
Step 7
Ok, lets recap. We’ve added a Layer Mask, changed our foreground and background colors to black/white, set the gradient options and chosen the Gradient tool. So lets make something happen on the stage!
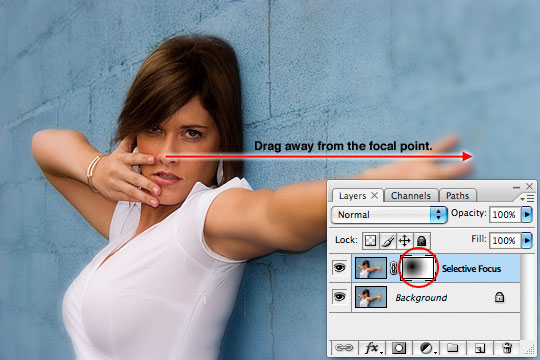
Click on the Layer Mask in the Selective Focus layer of the Layers palette to select it (you’ll notice the tiny brackets around the layer mask in the layer which indicate that you are working on the mask and not on the layer itself).
Now it’s time to lay down the gradient. I’m going to click and drag from the girls nose (where I want the focus to be clear) to her fingertips (where I want the focus to be blurry). Notice that the gradient now appears on the layer mask.
Step 8
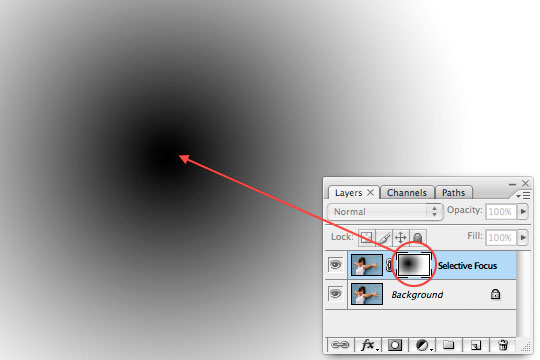
If I Option-Click (PC: Alt-Click) on the layer mask itself, Photoshop will show me only what’s on the layer mask. You can see that in our example the black radial gradient which has been created. Anything shown in black will make that portion of the Selective Focus layer transparent to the layer below, anything white will not.
Like any other layer, you can paint on an Adjustment layer. If I were to grab a black brush and paint over her entire body, all those areas would be in focus because all those areas would be transparent to our original layer below.
Step 9
So here is the photo with the selective focus applied. Notice how her face is in perfect focus but as we move away (and as the layer mask transitions from black to white) things become less and less clear.

Step 10
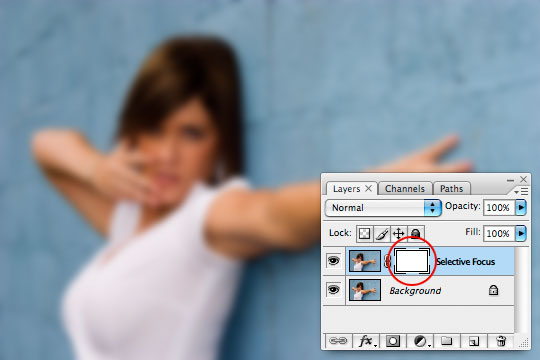
Ok, lets move on to the next technique. Since we’ve already blurred this layer and added a layer mask, there is no need to do all that again, so lets simply press Command-Backspace (PC: Ctrl-Delete) to fill the layer mask with white again. Notice that everything is blurry again because the layer mask is completely white and thus everything on this layer is visible.
Step 11
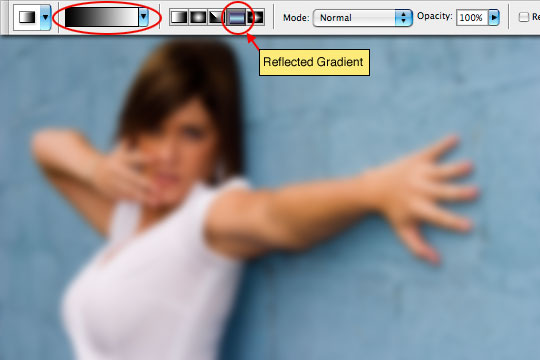
Now lets setup the Gradient tool to create the Tilt-Shift effect, which I mentioned earlier creates linear planes of focus. Choose the Reflected Gradient icon from the gradient options bar at the top of Photoshop and make sure that the Foreground to Background gradient option is still selected (as it should be).
Step 12
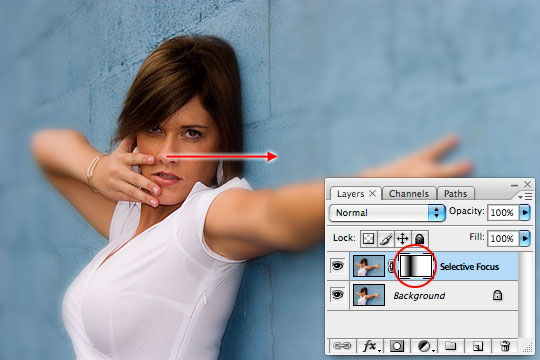
This time I’ll click and drag the gradient from her nose out to her elbow only to create a vertical column of gradient on the Gradient Mask. Notice that everything on that vertical plane is in focus from the top to the bottom of the photo, but as soon as the gradient leaves her face moving horizontally things blur very quickly. This is how the Tilt-Shift lenses get their unique focal effects.
Step 13
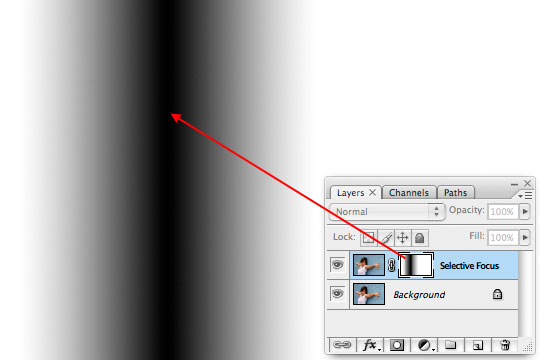
Here’s the isolated layer mask so you can see exactly what’s going on.
Step 14
And the completed Tilt-Shift image is the last of this lesson.
I hope you’ve learned something about using layer masks, and about how using different gradients can create some very compelling compositions using selective focus to draw your viewers eye to a certain aspect of your photo. Try experimenting with different gradients as well as using a soft edged brush to paint black onto the layer mask, which will allow you complete control in selecting which areas of the photo are to be in focus.
I have included a download file at the end of the lesson this time in which I’ve placed both the Selective Focus and Tilt-Shift layers for you to examine.

Lesson Files + Additional Resources
Download the free .PSD file and other lesson files Right Here.


11 Responses to Selective Focus and Tilt-Shift
Ryan R.
April 3rd, 2008 at 9:21 am
Great tutorial. I have seen several ways to do this effect. I prefer to use the lens blur filter, as it achieves a slightly more realistic lens blur effect. Also, using the depth map feature in the lens blur filter creates a more realistic depth effect because it doesn’t combine blurred and non-blurred images (soft effect), it actually blurs the image more or less depending on the map. It’s a little more complicated, but I thought it was worth mentioning.
Again, great tutorial! Keep them coming! :)
HERO
April 3rd, 2008 at 9:37 am
Ryan,
I agree with you on your usage/suggestion of the Lens Blur filter and will likely write a comprehensive (albeit advanced) tutorial on the Lens Blur filter dialog. This tutorial however was requested by a novice PS user and the Gaussian Blur method is a much simpler yet very effective method.
Sacha
April 3rd, 2008 at 10:27 am
I really like the lens blur filter combined with a depth map too !
But anyway understanding how masks works is a pre-requisite for this more advanced technique, and it’s always good to get the basics down first, so thanks for this tutorial.
dilirum
April 3rd, 2008 at 10:36 am
Word. A great tut no less. I gotta say that I love the way you break it down and not only make it easy to understand – but relate it to the 35mm equivalent to demonstrate what lens would be comparable. A lot of other tut websites are just like… this is how it’s done… bam. But you go into more detail with the tools so that we not only understand what you did, but the effect and leverage of each individual tool. Thanks!
teli
April 5th, 2008 at 10:51 pm
Great tutorial, very useful. Thanks.
Steve
June 13th, 2008 at 1:27 pm
boooooobies… hehe. nice tutorial :)
Sam
July 16th, 2008 at 8:16 pm
The next tutorial should be on how to get rid of that pit stain she has. :)
HERO
July 16th, 2008 at 10:48 pm
SAM,
Funny, I didn’t even notice that… but now that you mention it, holy crap!
I’ll put that on the list after fixing her ratty fingernails.
Botaki
September 3rd, 2008 at 8:52 am
Nice tutorial..and some juicy boobies!!!…..
simpsonsmovieblew
November 15th, 2009 at 9:31 pm
hilarious comments
evilkitty75
November 22nd, 2009 at 7:21 am
omgosh u boys r gettin bitchy LOL
nice tut babs