


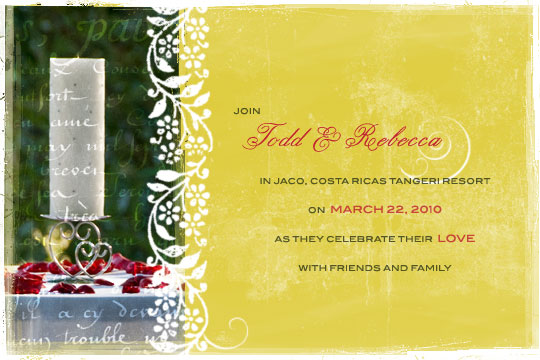
A Simple Wedding Invitation
This Photoshop tutorial comes to you by way of a request from Susan in London, who wanted to know how to create an invitation similar to one she'd seen online. I don't do too much girly stuff, so I thought this might be a good time to pander a bit to the ladies.Introduction
By way of preparation, you should already be comfortable using Layers and know how to Install Photoshop Brushes and how to Rotate them since a good deal of the heavy lifting in this lesson will be done with layers and multiple brushes.
**Special Thanks to Jillian Clark at 100LayerCake.com for permission to base this tutorial on her content!
Step 1
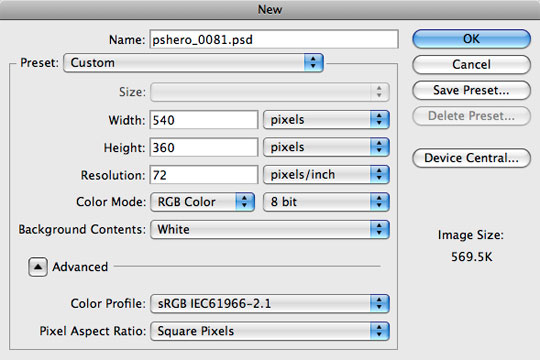
Lets jump right in and open a new document in Photoshop. For my illustration (and since this needs to be web-size), I’ll be using a 540×360 canvas at 72ppi. Obviously if you are creating an invitation for print, you’ll want to use a resolution of 150-300ppi and size your file accordingly (and adjust your brush and style sizes accordingly throughout the tutorial).
I’m also going to load a few brush sets into my Brushes palette right away so they’re ready to be used. If you’re following along at home, you’ll need to download Grunge Borders , Flowers n’ Swirls, Heavy Grunge and Manuscripts. All of which are free Photoshop Brushes available over at Brusheezy.
(*note: If you have any issues downloading the brushes, I have packaged them all in the lesson file .zip at the end of the lesson.)
Step 2
First we’re going to use a rough-edged brush at a low opacity to create some texture.
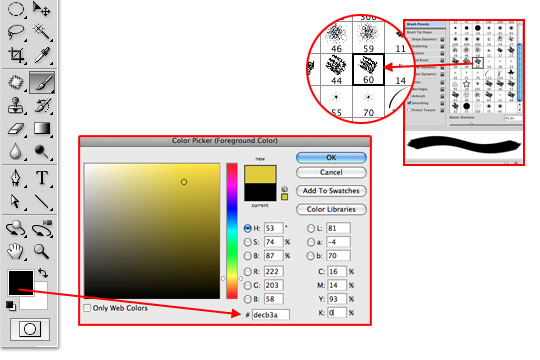
Press the B key to switch to the Brush tool and from the Brush Picker choose the Chalk 60 Pixels brush (which is one of Photoshop’s default brushes). Set your foreground color to #decb3a by clicking on the swatch in the Tools palette and entering the hex code at the bottom of the Color Picker.
Step 3
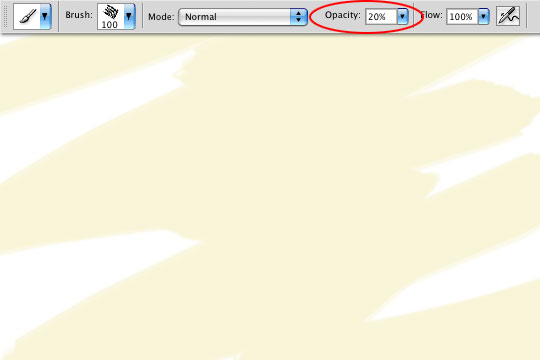
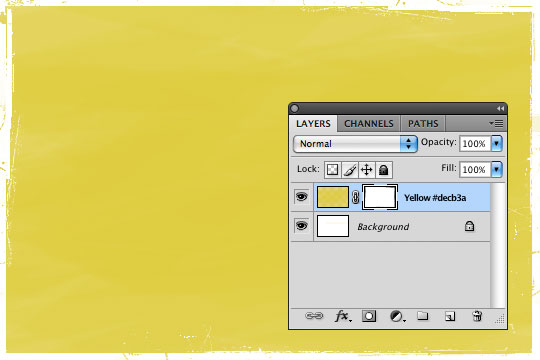
With our brush setup and color chosen, create a new layer called Yellow in your Layers palette, set your brush Opacity to 20% in the Brush Options bar at the top of Photoshop and paint roughly over the canvas as shown below.
(*note: When using an odd color like this that I may want to refer to later, I’ll copy the hex code into the Layer name.)
Step 4
Repeat this process of clicking and painting over the canvas several more times. Switch brush directions and keep it random to create a "painted" look that will give us some texture and depth in the background of our invite. Work the color until you’re happy with the result. Let your creativity be your guide, but remember that we’ve got to put text over this background AND we’ll distress it a bit before then, so some semblance of consistency is a good idea.

Step 5
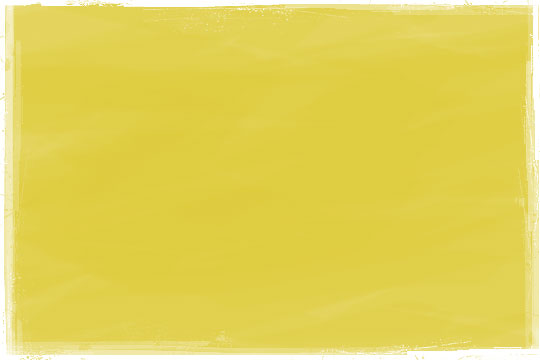
Add a Layer Mask to this Yellow layer by clicking the Add Layer Mask icon at the bottom of the Layers Palette. Turn your Brush Opacity back up to 100% in the Brush Options bar at the top of Photoshop, and then switch to one of the Grunge Border brushes you downloaded at the start of the lesson.
Using one of the long narrow Grunge Border brushes, paint onto the Layer Mask to create raw edges all the way around the invitation (this is where knowing how to Rotate Brushes is going to come in handy).
Step 6
Now lets drop the Brush Opacity down to 20% and intrude a little further into the edges to add to the effect. Play around until the edges "feel" right. Remember that you can switch to painting with white on the Layer Mask if you feel you’ve taken away too much from the edges.
Step 7
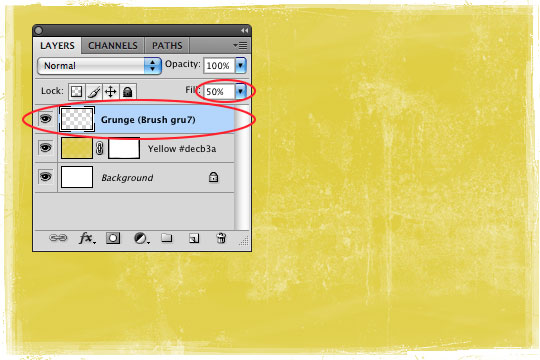
Create a new layer above the Yellow layer called Grunge. Switch your brush color to white and pick the gru7 brush that is part of the Heavy Grunge brush set. Make sure you’re painting with 100% Opacity, position the brush over the canvas and click once to add the grunge. Lower the Layer Fill to 50% opacity in the Layers palette to blend the grunge into the background.
Step 8
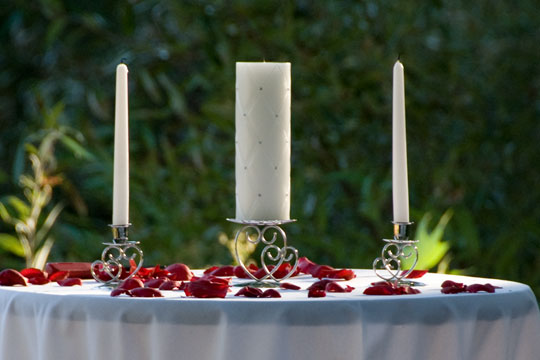
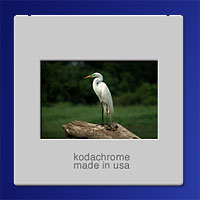
Next we’re going to bring in some visual interest with a photo. Here’s where you can get creative, but try to pick an image that’s complimentary but not distracting (try to avoid pictures of people). I chose this nice shot from a friends wedding I shot last year. My photo is larger that the canvas, which will give me some nice adjustment room once we get it masked into place.
(*note: I’ve included a .jpg version of my larger photo in the file download at the end of the lesson.)
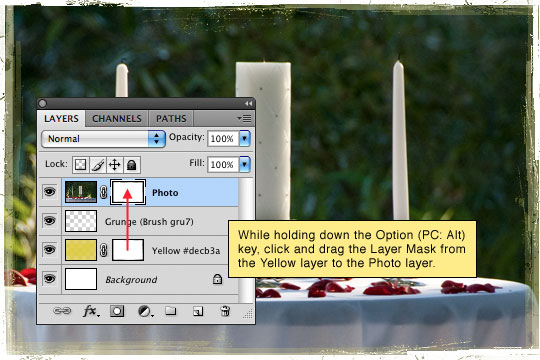
Step 9
We can copy the mask we’ve already created on the Yellow layer to the Photo layer by simply holding down the Option (PC: Alt) key and clicking-and-dragging the mask from one layer to the other.
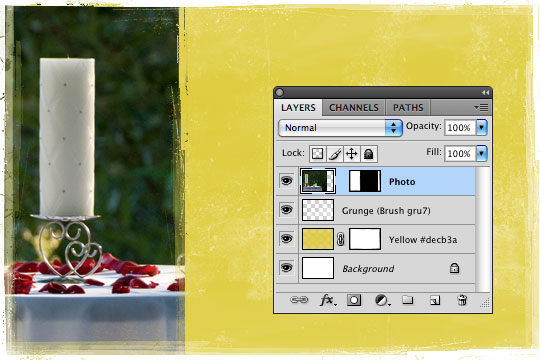
Step 10
Click on the lock icon between the Layer Thumbnail and the Layer Mask on the Photo layer. This will allow you to move the photo independent of the mask, which will allow us to move our photo and adjust it’s position without screwing up the mask.
Position your photo how you think you’ll want it in the left 1/3 of the invitation and then using those Grunge Borders brushes on the Layer Mask, mask the photo into place.
Step 11
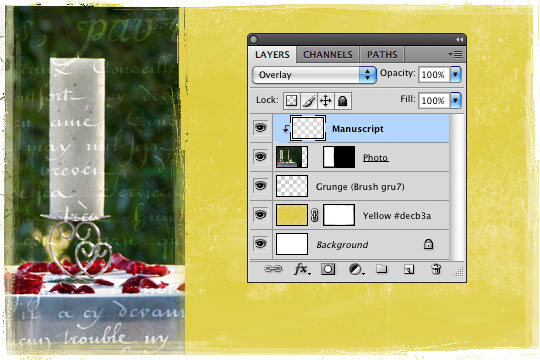
I want to put a little old manuscript writing over the photo and blend it for more depth, so lets create a new layer at the top of the Layers stack called Manuscript. Switch back to the Brush tool, make sure you’re foreground color is set to White and the Brush opacity is at 100% then pick one of the brushes from the Manuscript set that you loaded at the beginning of the lesson. Position the brush over the photo and click once.
It might take a few tries to get the manuscript onto your photo but just use Command-Z (PC: Ctrl-Z) to undo if you need to try again.
Change the layer’s Blend Mode to Overlay in the Layers palette and then create a clipping mask to the Photo layer by simply pressing Command-Option-G (PC: Ctrl-Alt-G).
(*note: You can also create a Clipping Mask by right-clicking on the Manuscript layer and choosing Create Clipping Mask from the menu.)
Step 17
Things are shaping up nicely, but I’d like to add one more element before we move on to the text of the invitation.
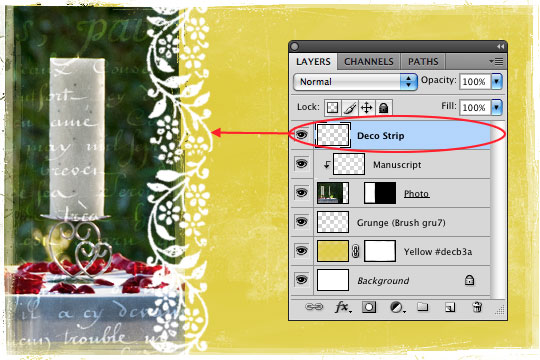
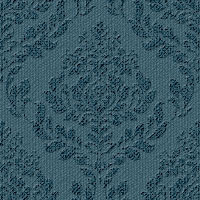
Create a new layer at the top of the Layer Stack called Deco Strip. Keep the Brush tool active with White as the foreground color and the Opacity at 100%. Choose the IndianBlockPrint14 brush from the Indian Block Print brush set, rotate and size the brush so it’s positioned vertically across the photo/background seam and click. (You can obviously use any brush or combination of brushes here to make your own unique Deco Strip… so experiment a little if you’ve got the urge.)
You could use another Layer Mask here to add a little distressing/grunge to the Deco Strip, but I think I like mine as bold as it is.
(*note: On a larger canvas, you may need to stamp a few of these vertically to span the distance.)
Step 13
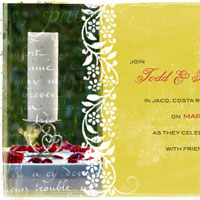
I’ll leave the text up to you. But since I’m sure I’ll be asked, the fonts used here are Champagne, Belphebe and BlairMdITC. Feel free to add another swirl or two if you’re so inclined… just be careful not to go overboard, because as they say… Too many swirls can ruin the party.
Thanks for reading, and ladies, I hope you enjoyed yourselves.
Lesson Files + Additional Resources
Download the free .PSD file and other lesson files Right Here.
Tell Your Friends
More in Graphic Design


37 Responses to A Simple Wedding Invitation
susan in london
August 21st, 2009 at 3:24 pm
Wow. You *are* a hero! On behalf of the ladies, thanks so much for posting this. I’m going to play around with it right away!!
Gail
August 21st, 2009 at 7:23 pm
Beautifully done – thank you!
Denver Photographer
August 21st, 2009 at 7:24 pm
I’m digging your ability to create great grunge edges without the help of texture layers. Its great stuff. Thanks for the info.
HERO
August 22nd, 2009 at 8:20 am
I love how the series of easy little techniques can add up to a great composition. Thank you for sharing!
Aimee
August 27th, 2009 at 6:28 am
This is GREAT! I used it for very special invites for a 12-year-old birthday party where the girls are all going for a spa day and dinner. My daughter is going to be thrilled! She’s been doing your tuts for almost a year now, and will be quite exctied to have one of your tuts be her birthday party invites!
Denver Commercial Photographer
September 4th, 2009 at 3:11 pm
A couple of weeks ago I posted a engagement shot where I used some of these same texture techniques. you should check it out.
Art Smith
September 8th, 2009 at 2:57 am
Great tut, many thanks for your efforts.
lei
September 10th, 2009 at 8:13 am
your tutorials great!
Marcie_H
September 20th, 2009 at 9:00 am
Awesome tutorial! Thanks so much for including the PDF download with the brushes.
semmy@ web 2.0 images
September 21st, 2009 at 4:42 am
Very Nice tutorial! Really Love it! thank you very much!
Philadelphia Medical Malpractice Lawyer
September 23rd, 2009 at 9:25 am
Well executed. Thanks for posting this tutorial. With a little tweaking, I think this could be used for a lot more than wedding invitations.
The Mom @ Babes in Hairland
October 20th, 2009 at 9:14 pm
Glad you came over to the “dark side” and pandered a bit for us ladies! Love it.
Photoshop CS5
October 27th, 2009 at 7:43 am
Thanks all
easy to follow
great tutorial
Really glad the PDF was included – so much more easier when you chaps do this
Rhode Island DUI lawyer attorney
November 18th, 2009 at 11:23 am
Lovely. This was a great tutorial. Bookmarking it — thinkin about doing something like this on the side.
Thanks.
evilkitty75
November 19th, 2009 at 1:27 am
beautiful lol thx babs xxx
jeprie
November 21st, 2009 at 4:54 pm
As always, love every tut you make. Thanks…
evilkitty75
November 21st, 2009 at 6:44 pm
Photoshop CS5? i disagree altho im greatfull hero n all the rest on other sites include the file i get no satisfaction from them im sorry but theres no accompishment in taking the PDF n editing it i like to do them meself!
andrii
November 25th, 2009 at 6:22 am
i love this one :)
mx
November 26th, 2009 at 7:24 am
cool… love your work Sir :)
Nazmul
November 29th, 2009 at 6:55 am
This is absolutely stunning, this website, is just one of the greats. I just can’t thank you enough!!
Deb Lein
December 30th, 2009 at 1:51 am
I’m always astonished what I can do with Photoshop with you holding my hand!
Sunshinemom
January 9th, 2010 at 10:01 am
My first time here and I am floored!! I have seen so many of these things on other websites and wondered whether I will ever be able to do it! Requires some amount of patience but I hope I will achieve at least a fraction of the tags and designs you have shared here. Thanks a bunch for sharing these!
Gosh, you are a Hero!
SEO Nottingham
January 27th, 2010 at 4:26 am
Great tut and very easy to follow, I’ve been looking for something good for invitations for ages – great job!
Robby Stathem
February 14th, 2010 at 6:34 pm
Another great technique; very stylish and elegant! :)
syed
March 10th, 2010 at 9:10 am
great skills.
very advance work.
thanks
banks
March 31st, 2010 at 10:47 am
great one there.. guess i have 2 download to pratice it .. thanks
Angie
April 17th, 2010 at 3:13 pm
Cute! And the polls are in… the ladies all love it!
Very helpful…
I also dig the fonts.
Amanda Marie
May 13th, 2010 at 12:33 pm
This is a great tutorial! It was easy to follow and it has given me enough knowledge to experiment myself to create something that will be fitting for the occasion.
Thanks!
Hmut
May 21st, 2010 at 1:51 pm
wooow
very good
i love you ^^
thanks
lyn
June 3rd, 2010 at 3:13 am
great toturial!!! thank you so much.
Mwasamani Gunda
June 10th, 2010 at 5:49 am
Its nice tutorial.
francis
August 9th, 2010 at 4:48 am
All of these stuff was really amazing and helpful. I was really boost to further enhance my photoshop skills. Thanx guys for sharing!
Photoshop Friends
September 27th, 2010 at 11:51 am
great tutorial! i wonder how many people use it and don’t change a thing…
sunny
February 15th, 2011 at 4:45 pm
awesomeeeeeeeeee !!! I am a still a toddler in designing yet this practice certainly boosted my confidence… thank you for the tutorial.
Nickelodeon Games
February 18th, 2011 at 7:35 am
Awesome, just when I ran out of Simple Wedding Invitation mentioned on google and other blogs, we get this. great!
Thanks alot mate, this is a really nice tutorial:)
I use it for my wedding this month!
Ching
February 22nd, 2011 at 11:58 pm
Yoou make it look so simple, thx
pakDE-Nanto
March 13th, 2011 at 6:59 am
Yes… that’s basic tuts, but very nice Composition…… Useful for beginners…Thank