


Installing And Managing Brushes And Other Presets
I've had a few noobs ask about installing Brushes, Shapes in Photoshop, so in this tutorial I'll demonstrate how to install new Photoshop Brushes and also discuss a few techniques that will help you keep your additions organized and safe.Step 1
We’ll be talking specifically about Photoshop Brushes in this tutorial, but the process is exactly the same for adding and managing Swatches, Gradients, Styles, Patterns, Contours and Custom Shapes as well, so just know that even though I’m talking about brushes, the information shared here applies the all these. Before we get into the meat of the lesson, lets start by taking a quick look at how Photoshop stores and uses these things.
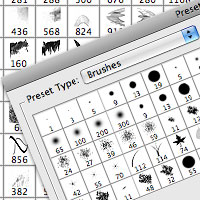
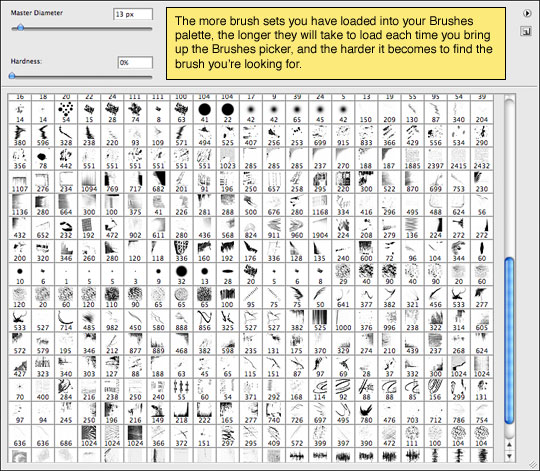
Photoshop allows us to keep as many brushes in the Brush palette as we’d like, but the more stuff you pack into the palettes the slower those palettes will load (because every brush takes a little memory) and the harder it’ll be to find the brush you’re looking for. I find that organizing and properly naming my brush sets in an external Brushes folder and then loading only the brushes I need for a specific project makes my life much easier.
Step 2
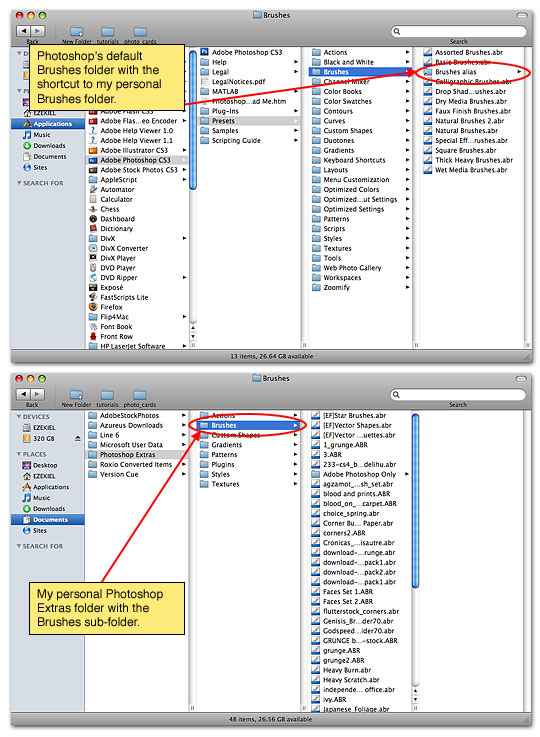
By default, Photoshop keeps it’s extras and plugins inside it’s program files folder structure, and although you could simply load everything into Photoshop’s default folders, I find it’s useful to create a folder set of my own to keep additional Brushes etc. inside. There’s nothing more frustrating than spending hours and hours searching for and downloading the perfect brushes only to loose them accidentally when upgrading or re-installing Photoshop.
I keep a folder called Photoshop Extras in the Documents folder of my computer, and in that folder I have sub-folders for all the different kinds of add-ons that Photoshop can use. I keep all my downloaded brush sets there. To make Photoshop see the contents of this extra folder, all you have to do is create a shortcut to this additional folder in Photoshop’s default brushes folder and SHAZAM! the brushes from both folders will appear in the Preset Manager.
Like I said, this step isn’t necessary, and it’s just fine if you want to put your new brushes in Photoshop’s default Brushes folder, but this what I do because it makes it easy to backup, restore and even share all my 3rd party stuff. Plus, it satisfies my obsessive compulsive need for excess organization.
Step 3
Ok, with my compulsive organizational speech out of the way, lets go ahead and find a set of brushes to install. There are a ton of great places to find free Photoshop Brushes on the internet, but probably the most comprehensive and FREE brush site I’ve found is BrushKing.eu (at this moment the site has 239 Brush sets containing an astounding 4285 Brushes). And I’m proud to have them as a sponsor of the site this month, so please take some time to check out their huge brush selection. Did I mention they’re free?
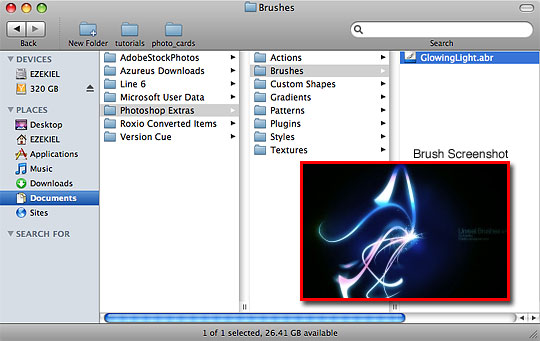
If you want to follow along at home, I’m downloading a brush set called "Unreal Brushes v.4", and once it’s downloaded I’m going to put it into the Photoshop Extras> Brushes folder that I mentioned above. You’ll notice that sometimes these brush sets download with funky names, so I always rename them with a description that I’ll recognize, in this case I’ll call them "GlowingLight.abr" because that’s what the screenshot for the brushes looked like.
(*note: For this example I’ve cleared out my Brushes folder so it’s easy to see the new brush set.)
Step 4
Now that the new brush set has been moved to our Brushes folder and renamed, lets open Photoshop and load it into our Brush Picker!
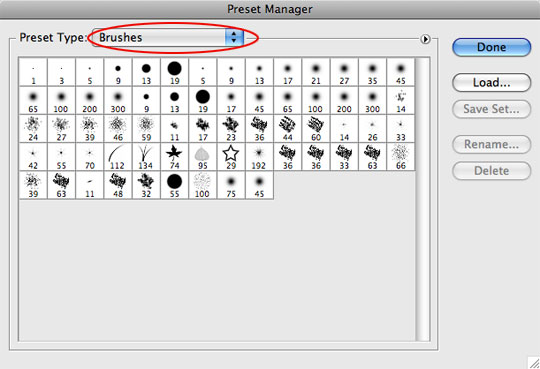
Although you can load brushes from the Brush Picker itself, let me show you another way. From the Main menu choose Edit>Preset Manager. The Preset Manager allows you to manage all your presets from one place and I’ve found it seems to work a little faster than working directly inside the Brush picker.
Choose Brushes from the drop-down menu at the top.
Step 5
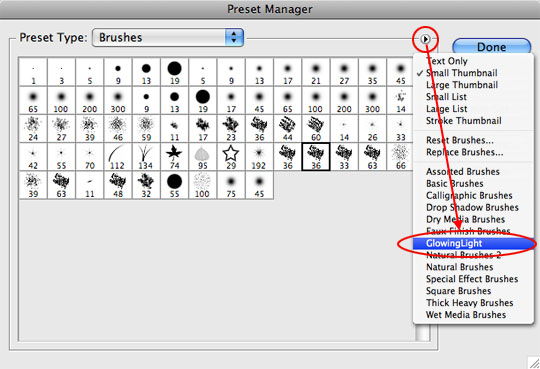
Inside the Preset manager you’ll notice a little circle with an arrow inside it at the top right side of the display area, and if you click it with your mouse it will open up a menu that has been populated with all the available brushes from Photoshop’s Brushes folder (as well as the brushes from the secondary Brushes folder that we talked about earlier if you chose to create it). You can see in the example below that my GlowingLight brush set is listed.
When you click on one of the brush sets, Photoshop will give you two options, to either add this new brush set to your existing brushes or to replace the existing brushes, click Append to add them, or OK to replace them. For my example I just clicked OK to replace the existing brushes with the new set.
(*note: Photoshop builds a cache of available brushes when it first opens, so if your new brush set doesn’t show up and you already had Photoshop running, you may need to restart the program to get it to appear in the list.)
Step 6
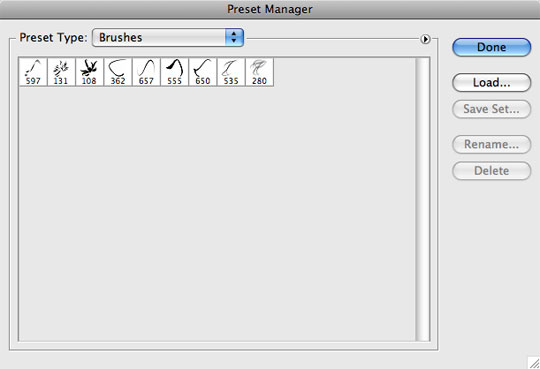
You can now see that the stock brushes in my Preset Manager have been replaced with the new GlowingLight set I chose.
On a side note, while inside the Preset Manager you can click and drag brushes to re-order them and you can delete a brush from the manager by Option-Clicking (PC: Alt-Clicking) on it. Deleting a brush from the picker is non-destructive and if you reload that brush set, the brush you deleted will re-appear (unless of course you resave the brush set over itself, and in that case any changes you’ve made will obviously be permanent).
And that’s it folks, the brushes are loaded and available for use and now you know how to add Brushes (as well as Shapes, Gradients etc) to the Photoshop Preset Manager and hopefully you’ve picked up a trick or two about file handling and organization along the way.
Lesson Files + Additional Resources
There are no file downloads or additional resources for this Photoshop tutorial
Tell Your Friends
More in Tips & Tricks


43 Responses to Installing And Managing Brushes And Other Presets
Ulrich
December 23rd, 2008 at 1:09 pm
Hero, I’m not a noob, but it’s great to have a refresher in the basics from time to time. I’ve never done this from the preset manager, I didn’t even know it was there! Also, the personal folders is a great idea. Thanks!
HERO
December 23rd, 2008 at 1:12 pm
Ulrich, I sometimes worry about putting really basic tutorials up because I know that a good number of the readers are fairly skilled in PS, but every once in a while I try to get back to the basics. Thanks for the comment.
Chad
December 24th, 2008 at 8:54 am
Hero, that shortcut idea is perfect…thanks for pointing it out.
Page Gardens
December 24th, 2008 at 6:58 pm
Useful refresher.
CORNELIUS
December 25th, 2008 at 12:45 pm
HERO!, you are my hero!
Please go on.
Thank You very mutch.
Luke314pi
December 26th, 2008 at 6:41 pm
I have been using Photoshop for six years, and I didn’t know about the Present Manager. Thanks for the tips!
Chip
December 30th, 2008 at 1:01 pm
As always, quick, to the point and accurate – thanks for the great tuts.
deb
January 4th, 2009 at 1:42 pm
Wonderful tutorial, especially the organizational techniques. I’ve found in addition to using the “Photoshop Extras” folder I can add subfolders by type and organize presets even further – it’s useful for stuff like holiday shapes, etc. Thanks!
Keukii
January 6th, 2009 at 7:38 pm
Hero..
it’s been a long time I didnt touch my photoshop since I was busy with my baby.. but am back again to learn and try to find the treasure of photoshop. You are awesome! Your website really neat and easy to follow.. thank you Hero! :)
Ashok
February 5th, 2009 at 4:30 am
Thank You very mutch.
Jehu
February 9th, 2009 at 9:38 am
my brush/actions/pattern management/organization skills are Terrible!Ii’ll give this one a thorough run-thru.(BTW I’ve been using PS for nearly 12 years and am constantly learning new things).
Melanie Gardner
February 23rd, 2009 at 11:34 am
Hey there
I love your tutorials but am having trouble with this one.
I cant seem to down load the brushes, when I download them and try to open them it comes up with unable to open, wrong kind of file. and I cant seem to unzip them, when I right click on the file, it doesnt come with the option to extract. I have windows vista
Do you know what I am doing wrong.
HERO
February 24th, 2009 at 2:45 pm
MELANIE, Are you talking about the brushes from BrushKing? And if so, they are not zip files, they are simple Photoshop .abr brushes files, so all you need to do is put them in your Brushes folder and load them into PS. No extraction needed.
Daniele DiBartolo
February 24th, 2009 at 9:34 pm
I have photoshop and i would like to know what is the proper way to remove brushes?
HERO
February 25th, 2009 at 7:47 pm
DANIELE, that depends on if you’re wanting to delete the brush sets from your computer or just remove them from the Brush Picker. To remove them from the picker, open the Preset Manager and while holding down the Option (PC: Alt) key (the cursor will turn into a pair of scissors), simply click on the brushes you want to remove. To get rid of them completely, you’ll have to delete the .abr files from your Brushes folder.
sebgonz
March 5th, 2009 at 4:56 am
This is a great, simple tutorial. Although, something that I noticed is that if you have a lot of brushes in your Extra Brushes folder, and you add a shortcut to that folder in the presets, you list gets extremely long. You may end up filling your entire screen with brush options when you click the balloon arrow. Is there a way around this? Or am I stuck with simply having to load the brushes the manual way all the time?
HERO
March 5th, 2009 at 9:15 am
SEBGONZ, The answer is yes, you are pretty much stuck with either keeping a bazillion brushes in your brush palette or loading them as you need them. I prefer the load as needed route. If anyone’s got a better way, I’d love to hear about it.
Daniel
March 9th, 2009 at 2:54 pm
I like this tutorial thanks and God bless you
aa
March 15th, 2009 at 2:58 pm
hi there. i wana to tht how can we add differnt colors in brushes.
thanks.
Spades
April 17th, 2009 at 8:01 am
Ok, but: can you organise subfolders for brushes?? It would be really useful if we could do that! Instead of having a huge list of brushes and finding the one you want (even if they are well renamed)
HERO
April 23rd, 2009 at 7:44 am
SPADES, Unfortunately although a great idea, the sub-folders idea isn’t currently supported by Photoshop. My recommendation here would be to create Brush Libraries (sometimes called Brush Sets) that you can then load into Photoshop at will. This will allow you to put all your similar brushes into a single set which you can add or subtract from using the Preset Manager at any time. I’ll add this to my list of upcoming tutorials, but for now a quick Google search for “Manage Photoshop Brushes” should yield a few step-by-step’s for this.
taueva
July 4th, 2009 at 1:45 pm
Love your tutorials. Thank you!
Oyunlar
July 5th, 2009 at 10:06 pm
i love here :)
Jr
August 16th, 2009 at 3:52 am
Did it all over again… Works like a charm ^^
Thank You so much!
Sundus
October 2nd, 2009 at 6:35 am
Thank you so much .. my photoshop is working faster .. this was really helpful
Thanks once again
Hastaneler
October 3rd, 2009 at 4:38 am
Thank you, nice article.
Anna
October 19th, 2009 at 1:26 pm
Hi I’m A Noob and i was wondering on how you edit your brushes if you need to? such as the pressure and stuff.
HERO
November 5th, 2009 at 6:38 pm
ANNA, If you open the Preset Manager and choose Brushes, you can hold down your Option (PC: Alt) key and click on any brush to delete it from the palette. You can also click and drag to move the brushes around in the palette.
Lana
January 12th, 2010 at 4:30 pm
Thanks for the tutorial! I’ve recently downloaded a huge number of brushes for experimenting with and I don’t want to confuse my photoshop by having them all loading in every time I open it… I’m keeping them in a separate folder, but I notice that they stay in the brushes palette between closing and opening the program, will this gum up the works? Do I have to delete each brush every time I close the program to avoid slowing things down, or is just keeping them in a separate folder enough? I’ve already got a lot of brushes to scroll through in the palette! (I’m using photoshop CS 8.0) I’d appreciate any advice! :)
HERO
January 17th, 2010 at 11:57 am
LANA, I typically only load the brushes I need for what I’m doing. I’m not a big fan of having to scroll through a huge brushes palette, so I’ll reset my brushes and load what I need when I need it.
Glenn
January 20th, 2010 at 11:07 pm
great idea to organize the Photoshop brushes :)
Ian
April 15th, 2010 at 11:45 am
ThanX… I have been trying to figure out how to organize the huge brush list I have ended up with as of late. I had always kept a “photoshop supplemental” folder but placing the link to the main folder makes it much more useer friendly. Now I just need to figure out how to make the brush libraries or sets that you mentioned. I am hoping to organize in groups, kinda like: grunge brushes, splatter brushes, vector brushes etc… ThanX again
Flash tutorials
May 8th, 2010 at 9:11 am
GReat way to induct bushes love article.
A??k Etme büyüsü
May 10th, 2010 at 1:20 am
great idea to organize the Photoshop brushes :)
Richard
July 18th, 2010 at 6:29 pm
Great tutorial. However I would like to know how to create the short cut for my new folder with my downloaded brushes so photoshop will recognize the folder when I click on the preset manager.
PSweden
August 27th, 2010 at 12:10 pm
Thanks Hero for this tutorial. Also, sharing the site with free brushes is great.
/S
Michael
September 5th, 2010 at 7:02 am
A great tip
Buffy Marie
October 30th, 2010 at 11:59 pm
I have avoided putting my brushes & such into personal folders b/c I’m too impatient to do all the clicking to locate the particular brush I want- I was so hyped to see your shortcut suggestion- I stopped reading to see if I could make it work… all i can say is “genius”… it works PERFECTLY!! Boy is this going to save a ton of time Thanx Hero!!
Canada web design
December 3rd, 2010 at 8:26 am
Superb tip will use it for the next project.
Leslie Nicole
December 17th, 2010 at 6:20 am
Great tip. I always keep my brushes etc. backed up in another folder, but hadn’t thought to create an alias.
Heather
January 11th, 2011 at 11:50 am
Hero, What a wonderful site I have just discovered, can’t wait to try some of your superb ideas. You seem to know all the ‘stuff’ we never see in books. Have made a note of many favourites and will visit again very soon.
Thank you, Heather
Grænfur
January 24th, 2011 at 10:34 am
Hey! Thanks for the tip.
But I’d like to add something.
(while I was writing this comment, figured to create something like a tutorial myself)
That doesn’t include Preset Manager, but that improved my brush managing.
http://graenfur.deviantart.com/art/Sorting-PS-brush-sets-194731109
Here you’ll see an illustration of what am I jabbering here about.
To understand the picture, please read it’s comment.
Cheers
Online Games
May 23rd, 2011 at 2:24 am
Thanks for the tip.Boy is this going to save a ton of time Thanx