

Photo Transfer Edge Effect
In this Photoshop tutorial I'll show you how to create a cool old photo transfer edge effect using a piece of stock photography, an alpha channel and the burn and dodge tools.Step 1
Welcome back my naughty little monkeys! I was up most of the night with this nasty flu that’s been going around, it’s not even noon and already I’m on my third can of Dragon, so if my writing’s a little off kilter, you’ll understand why. Did I just use the word kilter?
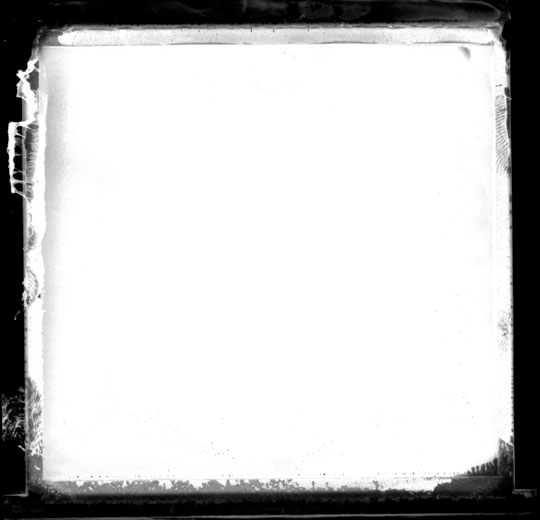
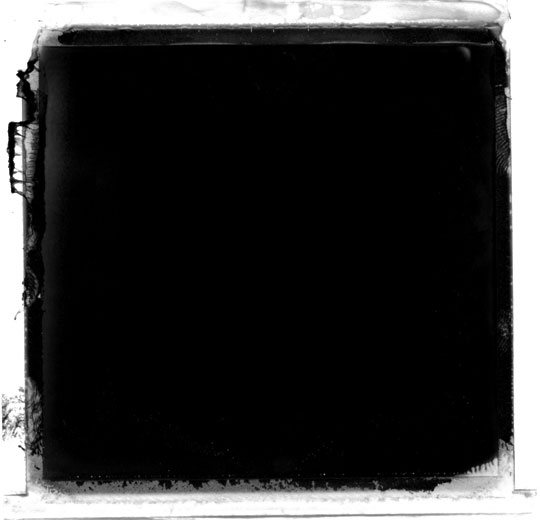
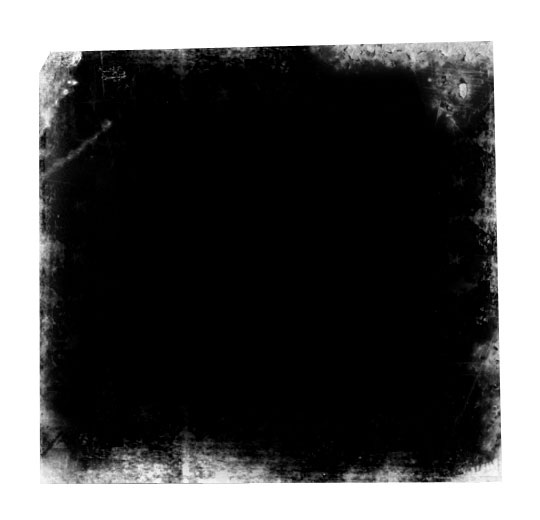
Lets get this party started with a visit to iStockPhoto where I found a cool looking stock image of an old medium format film border. There are tons of these available for free as well if you’re willing to put in the time to search. Incase you want to replicate this exact effect you can enter the product id (1249016) into the iStockPhoto search field. The nature of my contract with iStockPhoto doesn’t allow me to give away the original but if you know where to look, I may have "accidentally" left the associated Alpha Channel in the download at the end of the lesson.
Here’s the image I got from iStockPhoto. Did I mention I got it at iStockPhoto?
Step 2
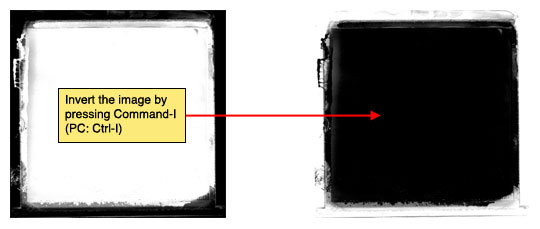
Since I ultimately want to use this image as a mask, lets go ahead and invert the tones by choosing Image>Adjustment>Invert from the main menu, or by simply pressing Command-I (PC: Ctrl-I).
Step 3
What I really want from this image is a true black to transparent mask, but what we’re currently working with is a black and white composite. It’ll take a few steps to do it, but trust me, the result will be worth it. Follow along closely, most of this will be keyboard shortcuts that won’t have any visual reference. Don’t worry, I’ll explain it as we go.
Press Command-A (PC: Ctrl-A) to Select All, then press Command-X (PC: Ctrl-X) to cut the entire image onto the clipboard (Yes, everything will disappear and you’ll be left with a white canvas… it’s ok, that’s what’s supposed to happen).
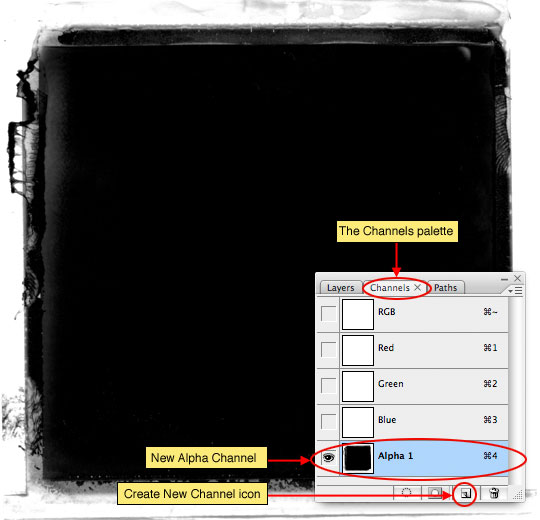
Now click over to the Channels tab in the Layers palette (*note: If your layers palette isn’t open choose Window>Layers from the main menu). Click the Create New Channel icon at the bottom of the Channels palette to add a new Alpha Channel to the bottom of the list of channels. Click on the new channel to select it and press Command-V (PC: Ctrl-V) to paste the image we cut from the stage into the channel.
Step 4
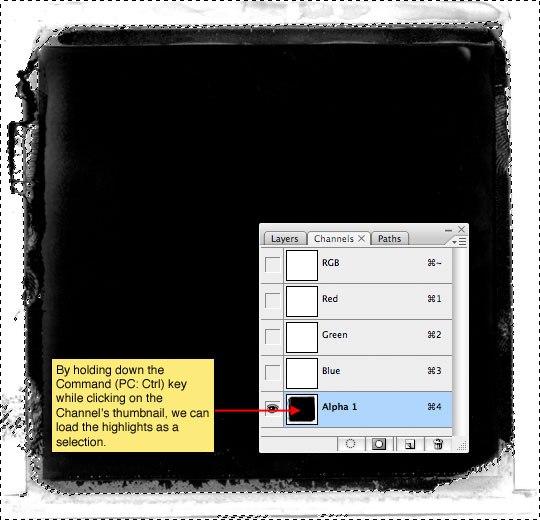
The advantage of having the black and white image in an alpha channel is that it allows us to load the highlights as a selection where a standard layer will not. Lets do that now by holding down the Command (PC: Ctrl) key and clicking on the layer thumbnail of our new Alpha Channel. Although the selection looks rather random and doesn’t seem to encompass all the white areas of the image, it actually does.
Step 5
With our selection made, lets click up on the RGB channel at the top of the Channels palette to make it active (*note: this will hide the channel we were just working on and make only the selection visible.
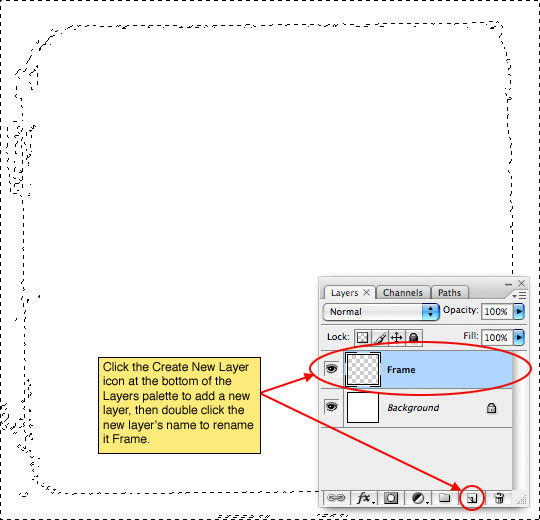
Click back to the Layers tab and add a new layer by clicking the Add New Layer icon at the bottom of the layers palette then double click on the layer’s name to rename it Frame.
Step 6
Since our alpha channel allowed us to select only the highlights but what we really want are the shadows, lets go ahead and invert the selection by choosing Select>Inverse from the main menu or by using the keyboard shortcut Command-Shift-I (PC: Ctrl-Shift-I).
Press the D key to reset your foreground color to black and then fill the selection by pressing Option-Delete (PC: Alt-Backspace). We’re now done with the selection, so you can press Command-D (PC: Ctrl-D) to deselect.
Step 7
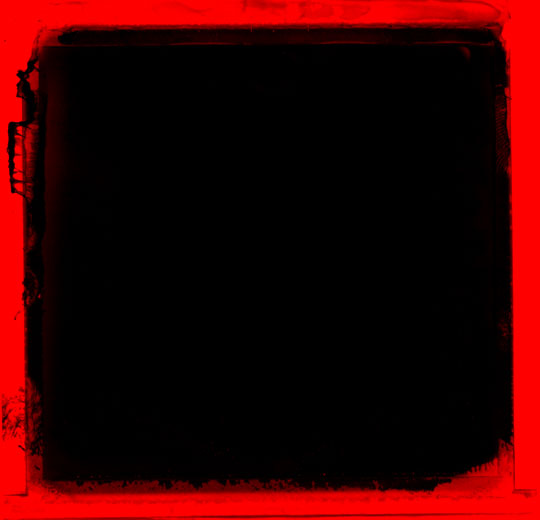
HERO! You might be saying, this looks just like the image we started with! … and of course that would be true, but things aren’t always as they seem. If I change my background color to red (you don’t need to do this, I’m just illustrating my point). You can see that the black has indeed been separated from the white background and is now isolated for use.
Step 8
Ok, we’ve done all the preparation, now lets get to work on the rest of the effect.
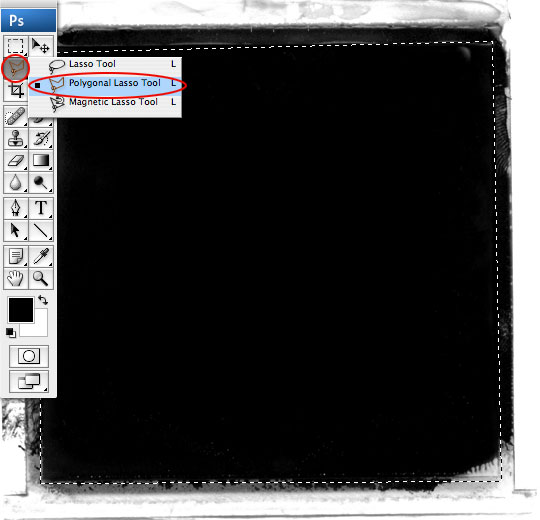
Grab the Polygonal Lasso tool from the Lasso tool fly out menu and clicking from point to point create a nice square selection inside the photo area. This selection doesn’t have to be exact or even, in fact, the less perfect the better. When you get back to your starting point the selection will close itself.
Step 9
Now that the selection is made, lets soften the edges just a touch by choosing Select>Modify>Feather from the main menu (*note: In some older versions of PS the path to the Feather option is Select>Feather.) This is a low resolution example, so I’m going to use a small 2pixel Feather, but if you’re working at a larger resolution you’ll want to adjust accordingly.
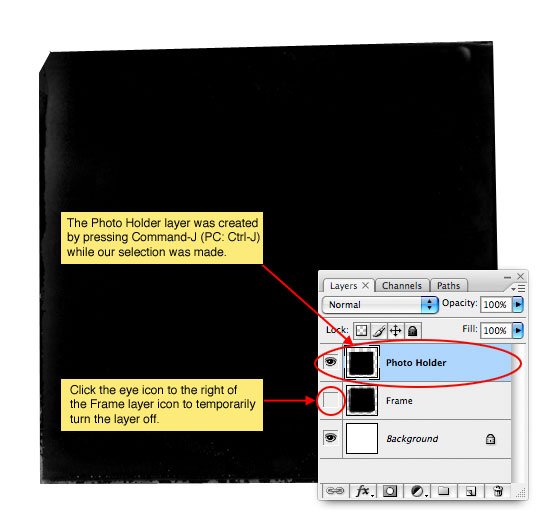
Now lets duplicate the selected portion of the layer by pressing Command-J (PC: Ctrl-J). This will put the selection onto it’s own layer above the original. Lets call this layer Photo Holder. In order to see what we’re working with lets also turn off the Frame layer by clicking the eye icon to the right of the layer thumbnail in the Layers palette.
Step 10
The edges of this layer are far too hard for this effect to be convincing, so lets press the E key to invoke the Eraser tool, and then by choosing different brushes from the brush picker we’ll delete small areas around the edge of the photo area. I used a variety of grunge edge brushes to distress my edges and I’m including those Photoshop Brush sets in the download at the end of the lesson. Yes, you’re right, that is very cool of me!
Here’s my Photo Holder layer after all the distressing. Remember that you can rotate the brush tips in the Brushes palette like I taught you in the Rotating Brushes tutorial to make the brushes work for every edge.
Step 11
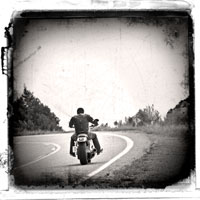
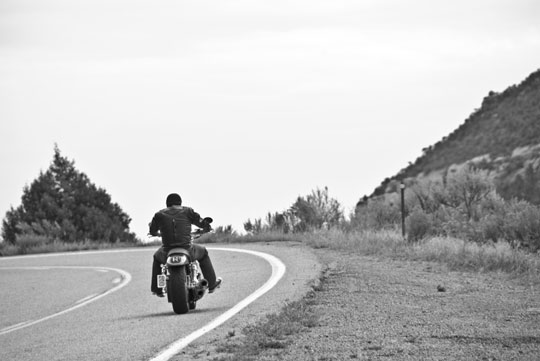
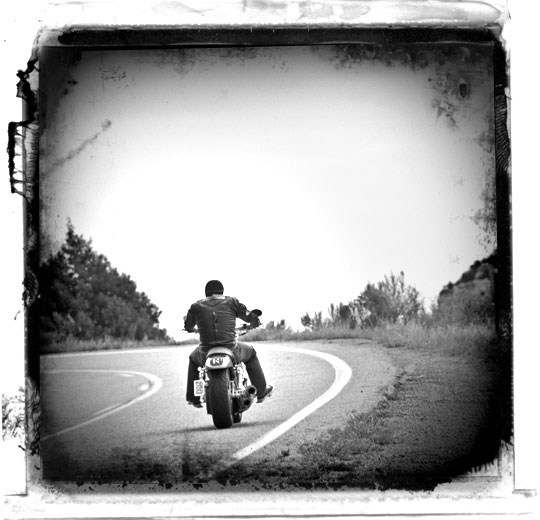
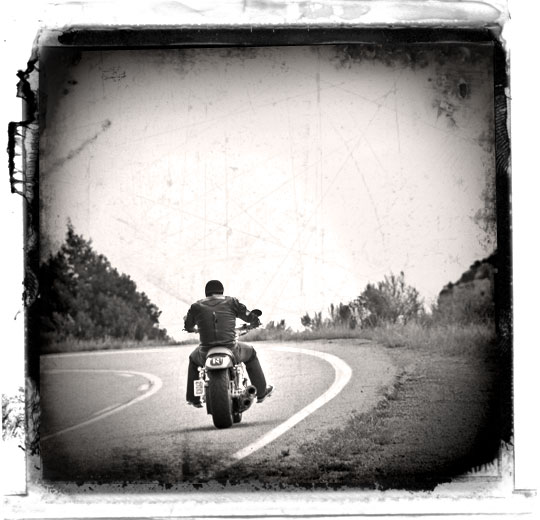
Lets take a break from this file for a moment and open the photo we will use for the effect. Mrs. Hero took this shot of me on a motorcycle trip to Telluride, Colorado last year. Yes, I look cool, I know.
For this effect I wanted to use a grayscale image (though you don’t have to). Because this tutorial isn’t about black and white conversion I just chose Image>AdjustmentS>Desaturate from the main menu to make it easy. If you want to get into black and white conversion in detail, I’d suggest picking up Scott Kelby’s Photoshop Channels Book and reading Chapter 4 in particular which covers using Calculations for B&W conversion (though the whole book is fantastic).
Step 12
With your photo open, press Command-A (PC: Ctrl-A) to Select All, then Command-C (PC: Ctrl-C) to copy the photo to the clipboard. You can now close your photo if you want by pressing Command-W (PC: Ctrl-W). How’s that for a bunch of keyboard shortcuts mashed into a few lines?
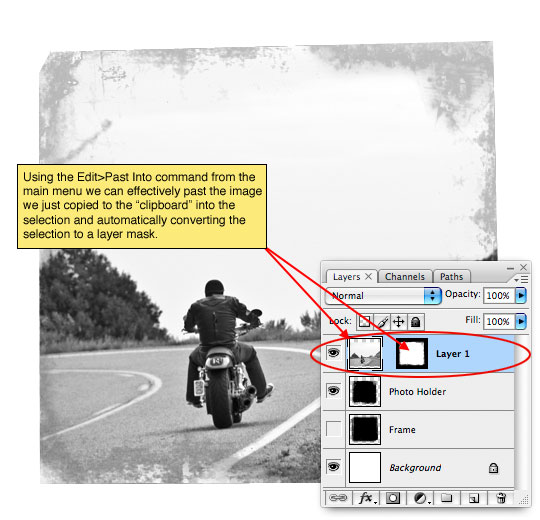
Now that we’ve got the photo copied to the clipboard (no, there’s no actual clipboard, it’s just an expression to let us know that the photo is copied into Photoshops virtual memory), lets return to our working file and more specifically to the Photo Holder layer which should still be selected as the active layer in the Layers palette. And just like we did when we were in the Channels palette, lets go ahead and Command-Click (PC: Ctrl-Click) on the Photo Holder layer icon to load it as a selection.
From the main menu (and this is the cool part) choose Edit>Paste Into. This will take the image we just copied to the "clipboard" and paste it into the selection, creating a new layer and using the selection as a layer mask! How awesome is that?
Step 13
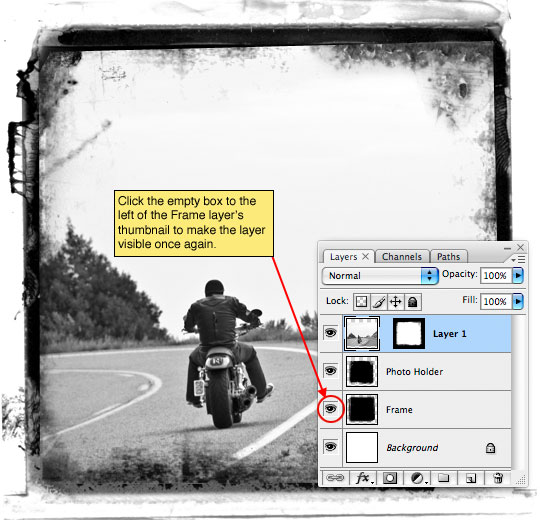
Ok, lets turn on the Frame layer again by clicking in the empty box to the left of the layer thumbnail (the eye icon will reappear long with the layer’s contents). Now technically we don’t need the Photo Holder layer anymore, but I’m going to leave it incase I want to modify it later. I’m also going to name the new layer with the photo on it Photo.
Step 14
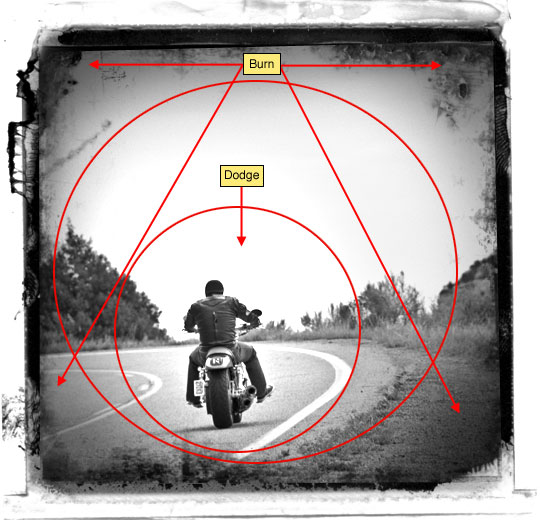
With the photo thumbnail selected on the Photo layer I now used the Dodge and Burn tools (found in the Tools bar / keyboard shortcut O) and using a soft edged medium sized round brush with the Range set to Highlights and the Exposure set to around 20% I’m going to darken around the edges and corners (Burn tool) and lighten around the subject (Dodge tool). This effect mimics the old darkroom techniques of dodging and burning an image to get this style of look. Perhaps the subject of a future tutorial, but I won’t be going into any further detail about the technique in this tutorial.
(*note: Dodging and Burning aren’t necessary steps here, and I’ll use a layer style in the next step to mimic the edge burning anyway.)
Step 15
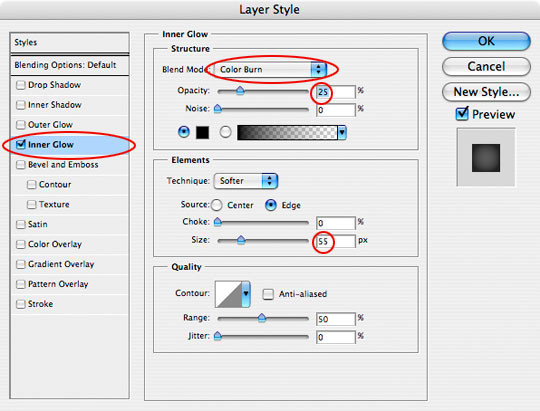
If you don’t feel comfortable using the Burn and Dodge tools too much yet, that’s ok, lets use a layer style to mimic the edge burn effect by double clicking to the right of the layer name in the Layers palette, or by Control-Clicking (PC: Right Click) on the layer and choosing Blending Options to bring up the Layer Styles dialog. Choose Inner Glow from the list on the left (Click on the text, not the checkbox) and add the following settings.
Step 16
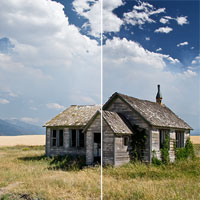
Here’s what my image looks like so far.
Step 17
I want the photo to look a little more aged so I’m going to use a fantastic brush (which is included in the download at the end of the lesson) called Scratch Heavy to do a little more distressing.
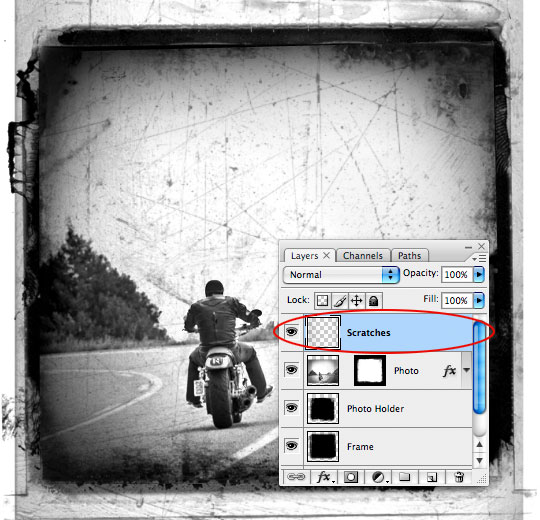
Create a new layer called Scratches, switch to the Brush tool by pressing the B key, load and select the Scratch Heavy brush and press the D key to reset the foreground color to black. I used the bracket keys [ and ] to size my brush to it was just a little larger than my image, then clicked once on the canvas.
Step 18
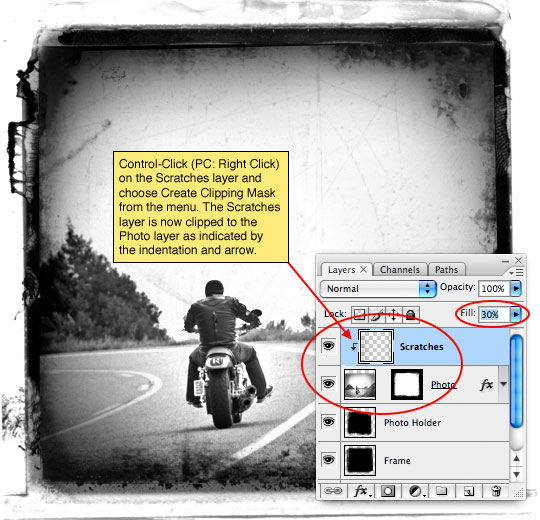
Obviously we don’t want the scratches to extend beyond the borders of the photo, so Control-Click (PC: Right-Click) on the Scratches layer and choose Create Clipping Mask from the menu. This will clip the Scratches layer to the Photo layer and the clipping will be indicated by an indentation of the Scratches layer and a small arrow between the two layers. The scratches are a little harsh though, so lets lower the Fill opacity of the Scratches layer to around 30%.
Step 19
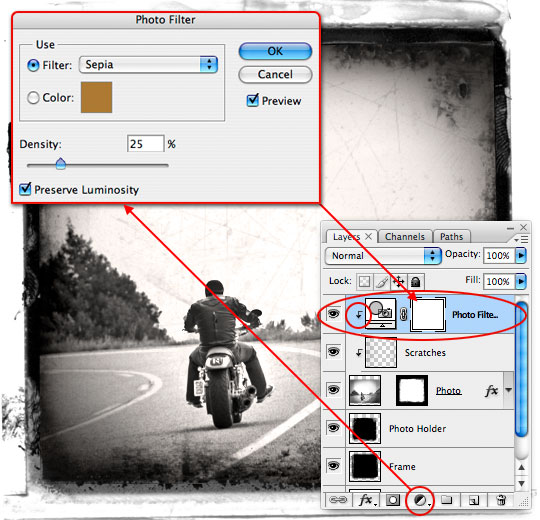
The last thing I want to do is add a little sepia tone to the image just to make it feel a little older. Click on the Create New Fill or Adjustment Layer icon at the bottom of the layers palette, choose Photo Filter and choose Sepia from the Filter drop down menu, leave the other settings alone and click OK. Now just Create a Clipping Mask with this layer as well just like we did in Step 18 and you’re done!
Step 20
And that’s it folks, a cool aged photo effect with a nifty edge detail. I hope you learned a little something along the way. I’m off to take a nap.
Lesson Files + Additional Resources
Download the free .PSD file and other lesson files Right Here.
Tell Your Friends
More in Photo Effects


102 Responses to Photo Transfer Edge Effect
HERO
August 3rd, 2009 at 3:21 pm
HELP?, I suspect that you’re choosing Paste from the edit menu rather than “Paste Into”. Either that or you didn’t Command-Click (PC: Ctrl-Click) the layer thumbnail earlier in the step to create a selection first.
sindu85
August 6th, 2009 at 6:25 am
awesome!! thx for this tutorial :)
Sara
August 12th, 2009 at 4:55 pm
This has go to be the most straightforward and clear lesson I’ve seen yet. Thanks!
Kim
August 17th, 2009 at 10:22 am
What an awesome tool to learn and this will help me with a new portrait series I am doing.
One question: With regard to the SIZE of the background created and the image you are pasting in…..I pasted an image onto the Photo Holder and the image was bigger than the holder and simply showed the image….Any advice on this.
Thanks so much,
Kim
HERO
August 17th, 2009 at 10:55 am
KIM, You’ll need to transform your photo down to the correct size. Make sure that the layer mask isn’t linked to the layer contents (if it is, simply click the little link icon to un-link them) and then simply Command-T (PC: Ctrl-T) to invoke the Free Transform tool. Resize and commit the transformation.
Kim
August 17th, 2009 at 11:26 am
Hay Hero, thanks for that!Will give it a go now,
Best from South Africa!……And ride it like you stole it:)
I ride a brace of Ducati’s.
Francois
August 18th, 2009 at 7:05 am
Great tutorial, thanks for sharing!!
Halden
August 21st, 2009 at 11:19 am
Hi there Hero, tried this mask and success for the most part needs some fine tuning from my side but brilliant, will make the most of this technique and will send on you website to all who are interested.
Cheers
Halden
DARCY
August 21st, 2009 at 11:41 am
What if I am printing my image? And its a CMYK? I cant select the RGB Channel.
HERO
August 21st, 2009 at 2:34 pm
DARCY, in that case just click on the CMYK channel silly.
Gabriel Machado
September 11th, 2009 at 1:56 pm
Simply amazing !!!
It’s easy and quick..
congrats!
Deniz
September 24th, 2009 at 7:54 pm
I’ve solved the problem with paste into by selecting first the area of the picture in photo holder layer that I want to insert the image, and than going to bw image and selecting & copying it, and then paste into works!
This tutorial is really what I wanted by the way. Thanks a lot!
Julian
October 18th, 2009 at 12:00 pm
Hey Hero,
thanks for all the advice you share with us through this website! It’s amazing how much i have learned in the last weeks only by looking through your tutorials! You have a great gift of explaining complicated things in a simple, straightforward way.
I just wanted to ask you a question about this tutorial: concerning the heavy brush you say “I used the bracket keys [ and ] to size my brush to it was just a little larger than my image”, sorry but what do you mean by that? Whats the thing with the brackets? Because when I try the brush doesn’t get big enough for the photo, is there any way to make it bigger without reducing the photo size? Thanks for the help!!
Julian
Curtis_copeland@yahoo.com
October 28th, 2009 at 8:10 am
Great tutorial. Very useful and practical. Bookmarked you on Delicious. Thanks for sharing!
HERO
November 5th, 2009 at 6:40 pm
JULIAN, using the bracket keys [ and ] will increase or decrease your brush size, but there is a limit to how large a brush can be (2500 pixels).
DB
November 6th, 2009 at 3:09 pm
This was a HUGE help for a project thanks!
Shanna
November 18th, 2009 at 9:17 am
Amazing.
Where can I find the brushes you used??
Marcin
November 25th, 2009 at 7:22 am
This is the most helpful tutorial for creating borders I’ve seen so far, and the best part is that I can even use low res samples for high res images. Thank you.
canvas paintings
November 27th, 2009 at 5:31 pm
wow, have tried it using your tips brilliant works quick and easy. thanks!
Claryssa
December 16th, 2009 at 9:45 pm
This is fantastic. I have only just stumbled across PShero and im stoked! Thanks for being so sharing with your skills.
kanacho
January 6th, 2010 at 9:10 am
thank you so much.
you have helped me for my photography work a lot.
yo should make videos…if you got time
dAn
January 30th, 2010 at 8:39 am
thanks..
your work really helped me.
Marianne
February 7th, 2010 at 4:38 am
wow, thankyou!
Lorie
February 14th, 2010 at 2:55 am
Wow, just discovered this site a couple of hours ago. Love your sense of humor… and everything else.
For those who lost the “Heavy Scratch Brush” after the download, I found mine in with the default brush file, instead of in a file named “PSHERO GrungeBrushes” which should have shown up at the bottom of your brush list… Haven’t a clue where I went wrong.
Check all your brush files. It will be #1024.
Tks again, Hero
Jake Laughlin
February 15th, 2010 at 7:43 am
Howdy, y’all! I’m relatively new at Photoshop, having taught myself mostly by perusing sites like this. I have a friend that bought a framed photograph that was a cool picture of a historic building, and the picture had the photo transfer edge effect. The picture was pretty big….I’d say maybe an 11×14. My question to you is this: how can I do something similar with this tutorial, but be able to have the picture printed and framed and have it be a similar size? Sorry if this is a stupid question, but as I said, I’m kinda new to this. Thanks!!
HERO
February 15th, 2010 at 3:06 pm
JAKE, You’re going to have to create a new document in the correct size and then recreate or resize your image to fit into that larger space.
Amanda
February 24th, 2010 at 6:01 pm
Thank you so much!
I made this following your tutorial:
http://manderooni.deviantart.com/art/Postcard-155311923
Brandi
February 26th, 2010 at 5:00 pm
Hey Hero, you are my hero. I love the way you relay the step by step information. However, I am stuck at the ‘paste into’ part. when i ‘paste into’ instead of a cute little picture under the layers, i get a grey blob. I re-read and re-did this over and over but cant seem to get it right. whats up? Thanks so much.
HERO
February 28th, 2010 at 7:26 pm
BRANDI, That’s a strange issue to have. Double check and make sure that you’re copying the image and not an adjustment layer or something from your photo file, also check to make sure that both files are the same bit depth (in this case 8bit)… You can check that under Image > Mode. If you still have problems, drop me a line and we’ll investigate this together a little more closely.
Amanda
March 4th, 2010 at 11:25 pm
Thank you thank you thank you! I’ve been wanting to learn how to do this for years! I’m officially your biggest fan!!!
Ashaloo
March 10th, 2010 at 4:25 pm
You are AWESOME! Thanks so much for all of your help. I came into this with NO PS experience and a new copy of CS4 and not a clue… I’ve actually been able to create some remarkable images using your guides. Oh, and I love your writing style — entertaining and informing!
THANKS!!
adam
March 19th, 2010 at 1:21 am
hey all, need some help, can’t figure out how to load and use the “scratch” brush tool? anyone? thanks :-)
chad
March 28th, 2010 at 10:08 pm
I am using cs2 and i cannot get step 12 to work. it will not create a layer mask??? what gives
Deexit
April 15th, 2010 at 2:33 am
Awesome ! very cool tutorial
Thank you
Isabel
May 21st, 2010 at 2:29 am
This is so amazing!!
Plims
June 2nd, 2010 at 12:31 am
Awesome, worked first time and I love it!
Luttie
June 10th, 2010 at 3:19 pm
Great tutorial. Thanks for sharing. Greatings from Belgium
babar awanm
July 29th, 2010 at 6:00 am
imran Babar
julay 28th, 2010 at 4:43 am
Howdy, y’all! I’m relatively new at Photoshop, having taught myself mostly by perusing sites like this. I have a friend that bought a framed photograph that was a cool picture of a historic building, and the picture had the photo transfer edge effect. The picture was pretty big….I’d say maybe an 11×14. My question to you is this: how can I do something similar with this tutorial, but be able to have the picture printed and framed and have it be a similar size? Sorry if this is a stupid question, but as I said, I’m kinda new to this. Thanks!!
Amanda
July 31st, 2010 at 9:21 am
HERO, you are my hero!!!
Bahar
August 3rd, 2010 at 12:44 am
my first LANGUAGE is not english;and i could not speak english very well;but your tutorial was great and useful;Love youre sense of humor
Chris
August 19th, 2010 at 2:01 am
Thank you so much for the tutorial. VERY VERY helpful and extremely carefully written. Nice job!
BITEM96
November 1st, 2010 at 11:55 am
thank you so much
and its great that your tutorials arent boring.
I ACTULLY UNDERSTOOD WHAT YOU WERE SAYING. I USUALLY GET STUCK BUT I DIDNT ONCE SO THANK U.
Paty
November 12th, 2010 at 2:46 pm
LOVE IT!! thank you!
pixeldamnation
January 20th, 2011 at 5:02 pm
Astonishing!. Well done!
Cosmicgurl
February 5th, 2011 at 1:52 pm
thank you for an amazing way to add complexity to my images – really – thank you. I will take the leap and continue my own experimentation.
mick
February 25th, 2011 at 4:17 am
Fantastic lesson! followed your tutorial then done it again 3 or 4 times, making my own frames, just to make sure I had learnt it and it had stuck. Wonderful! Thanks for the brushes also. Consider me a repeat visitor!
Malin
May 21st, 2011 at 5:29 pm
Thx a million, this was the best tutorial ever! No misunderstandings, worked straight away. And I love the funny little comments in between the instructions, haha.
Richard
July 27th, 2011 at 2:49 pm
Would this effect be appropriate or “period” for 1930 style photo/layout?
AVR
July 28th, 2011 at 12:31 am
Brilliant tutorial. Your -in between lines- comments are just a ball! Thank you for sharing your knowledges, but most of all, thank you for sharing them in such an easy way!
Ha Nguyen
August 6th, 2011 at 8:41 pm
You are soooo cool! Thanks =)