


Creating Old Paper With Custom Brushes
In this Photoshop tutorial I'll show you how to create a Custom Brush using a folded piece of paper and then how to use that brush to create an old piece of paper.Step 1
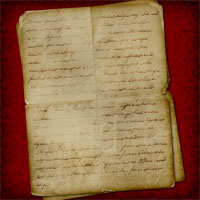
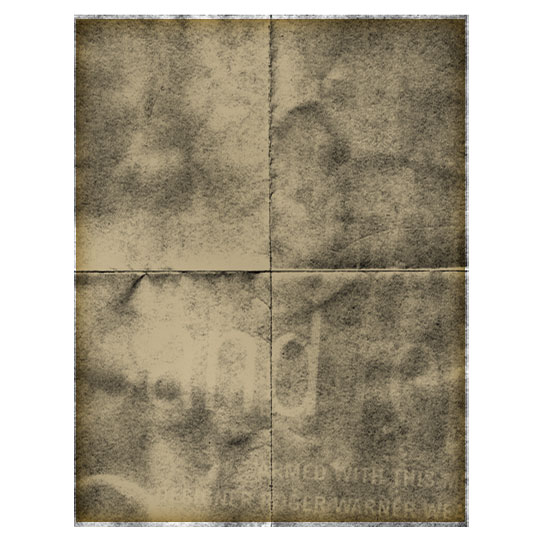
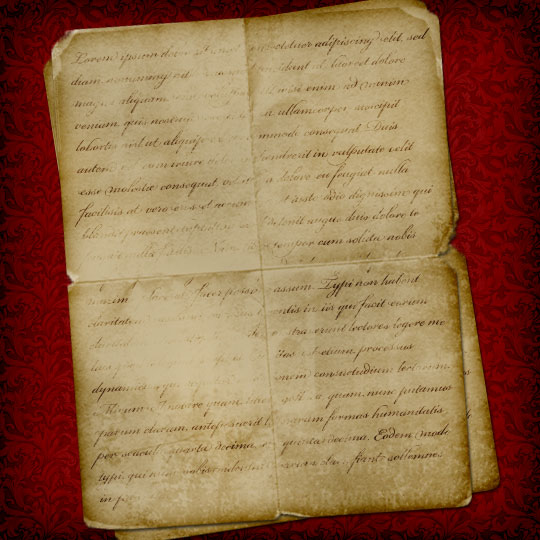
To begin this tutorial I took a plain white piece of paper, folded it in fours and left it in my pocket for a few hours. Next I scanned the paper using the Grayscale setting on my scanner. Because the both the paper and the scanner back are white, I placed a dark colored magazine behind the paper giving the cool result of a little text showing through onto my scan as you can see below.
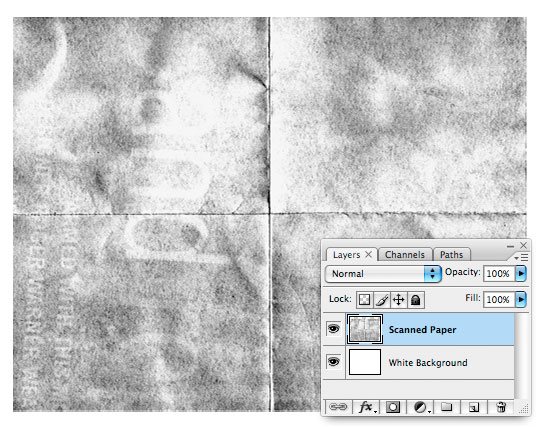
I’ve imported the scan into Photoshop directly from the scanner by using the File>Import dialog from the main menu and then placed the scan above a white background layer. (*note: You can make a Custom Shape from ANYTHING you can bring into Photoshop from photos to line drawings.)
No matter what you’re trying to make into a Custom Brush, it will need to be black and white. If you’re using a color photo or image, you can quickly discard the color information by choosing Image>Adjustments>Desaturate from the main menu.
Step 2
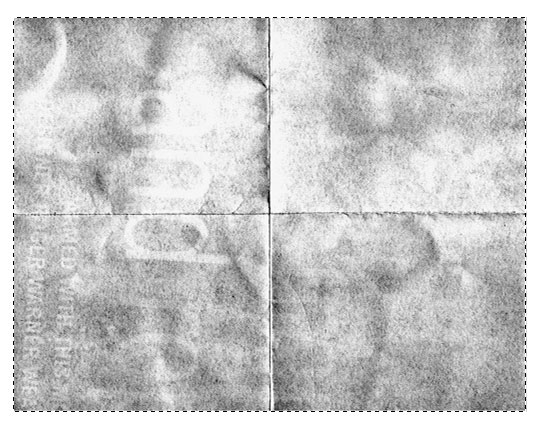
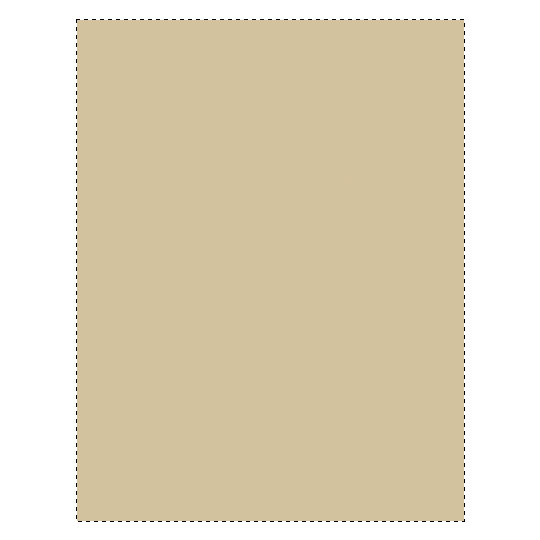
It is important to understand that when we create a Custom Brush anything on the stage that is white will be transparent when we convert the image to a brush, black will be opaque and the gray areas in between will be partially transparent.
Choose the Rectangular Marquee tool from the Tools bar by pressing the M key, then draw a selection around the area that you would like turn into your Custom Brush.
Step 3
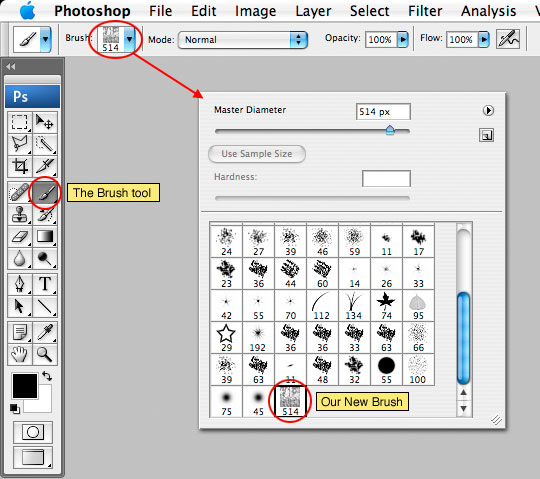
With the selection made, choose Edit>Define Brush Preset from the main menu, give the new brush a name and click OK. How easy was that? Your new brush has now been saved and if you switch to the Brush tool by pressing the B key and choose the brush drop down from the Brush Options menu at the top of Photoshop, you’ll see that the newly created brush has been added to the end of the list.
Step 4
I can now delete the Scanned Paper layer from my document and get to work creating a new piece of paper.
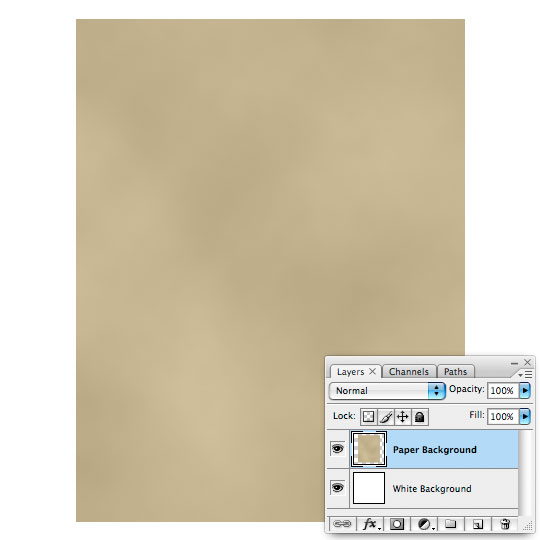
Create a new layer called Paper Background and set the foreground and background colors in the Tools bar to #d3c29d and #b7a783 respectively. Press the M key to call up the Rectangular Marquee tool and since the standard aspect for a piece of paper is 8.5 x 11, we will set the constrain options for the Marquee tool to Fixed Aspect Ratio with a width of 11 and a height of 8.5.

Step 5
Now that we’ve got our colors selected and the Marquee tool setup, lets go ahead and drag a nice big selection onto the stage and fill it with the foreground color by pressing Option-Delete (PC: Alt-Backspace).
Step 6
With the selection still active choose Filter>Render>Clouds from the main menu. This will create a nice variant of color on our old paper using a mixture of the foreground and background colors we set in Step 4.
At this point it’s safe to deselect by pressing Command-D (PC: Ctrl-D).
Step 7
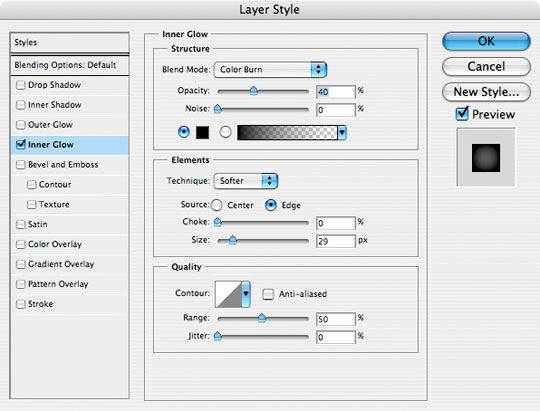
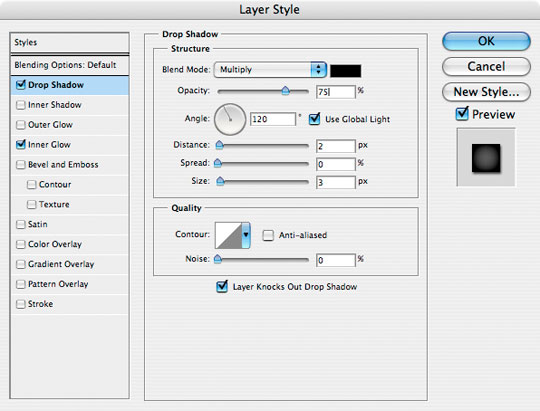
We will now use an Inner Glow layer style to darken the edges of the paper.
To call up the Layer Styles dialog you can either double click to the right of the layer name in the Layers palette, or Control-Click (PC: Right-Click) on the layer and choose Blending Options, then click on Inner Glow text on the left to add the following effect. Click OK when you’re done.
Step 8
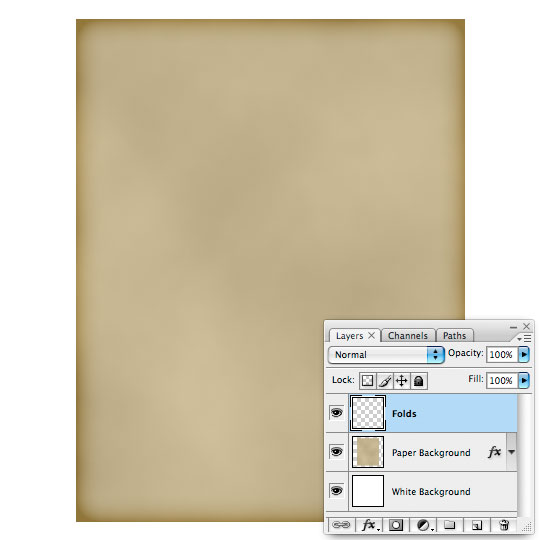
Add a new layer by clicking the Add New Layer icon at the bottom of the Layers palette and name it Folds.
Step 9
Now we’re going to use our new brush to create the folds and texture of the paper.
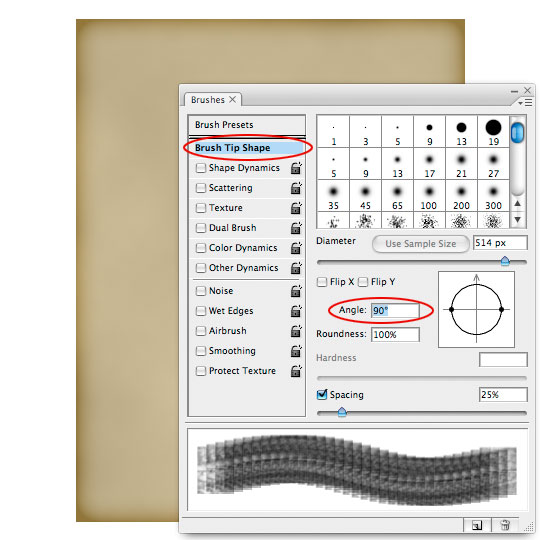
Press the D key to reset the foreground and background colors to black and white, then press the B key to switch to the Brush tool and from the Brush drop down at the top choose the new Folded Paper brush we created earlier. If you were following along at home you’ll now notice that the brush we created is oriented horizontally, but our paper is vertical. This problem can be solved easily by opening the Brushes palette from the main menu by choosing Window>Brushes. Click on Brush Tip Shape in the menu on the right and change the Angle to 90°.
Step 10
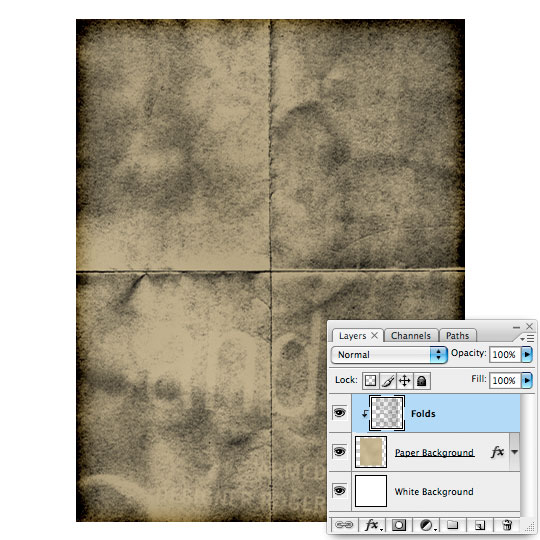
Position the brush over the paper and use the bracket keys [ or ] to enlarge or reduce the brush size until it’s just a few pixels larger than the paper size then simply click once to paint one instance of the brush onto the stage.
Step 11
Next lets Control-Click (PC: Right Click) on the Folds layer and choose Create Clipping Mask. This will clip the Folds layer to the Paper Background layer and will effectively hide anything outside the papers area. The clipping mask also allows the Inner Glow layer style which was added to the Paper Background layer to apply to the Folds layer as well.
Step 12
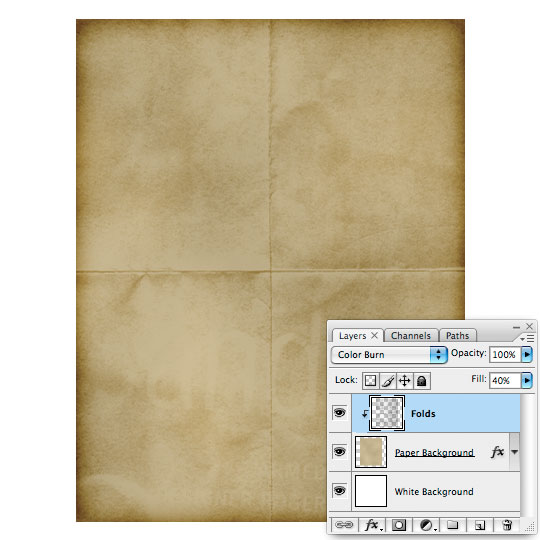
Now lets make the Folds layer blend correctly with the underlying layer by changing the Blend Mode to Color Burn and the layer’s Fill opacity to 40%.
Step 13
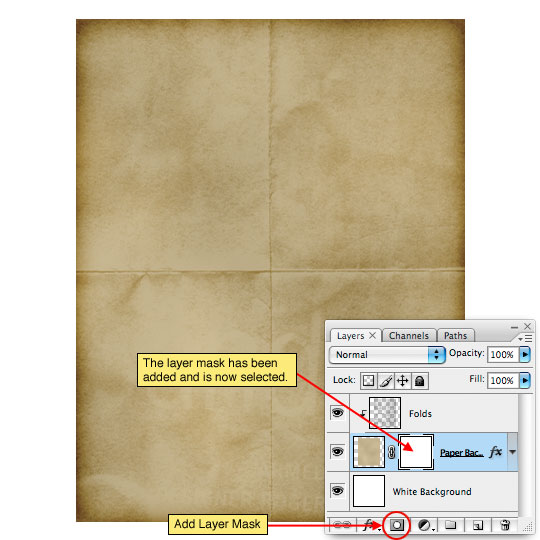
An old piece of paper should have some blemishes around the edges so lets click back down to the Paper Background layer in the Layers palette to select it and then add a Layer Mask by clicking the Add Layer Mask icon at the bottom of the Layers palette. This will allow us to rough up the edges of the paper without actually erasing from the actual layer. When the Layer Mask is added you will notice that it is by default selected (*note: You can tell the layer mask is selected rather than the actual content of the layer because of the black brackets that appear around the icon of the layer mask.)
Step 14
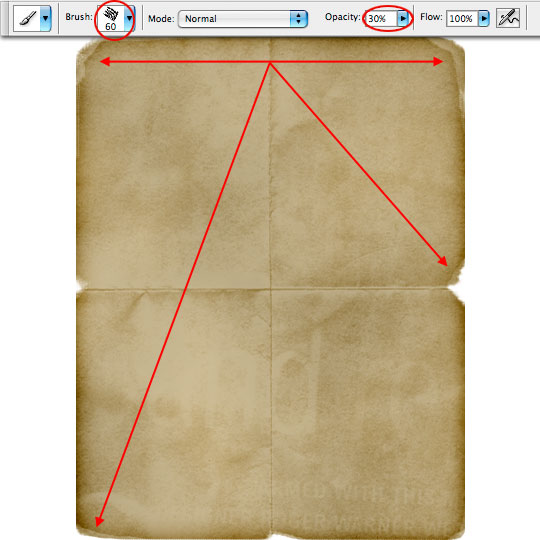
Press the B key to switch to the Brush tool, then choose the Chalk 60 pixels brush from the Brush Picker. This will be the rough edge brush I’ll be using to antique the edges of the paper.

Step 15
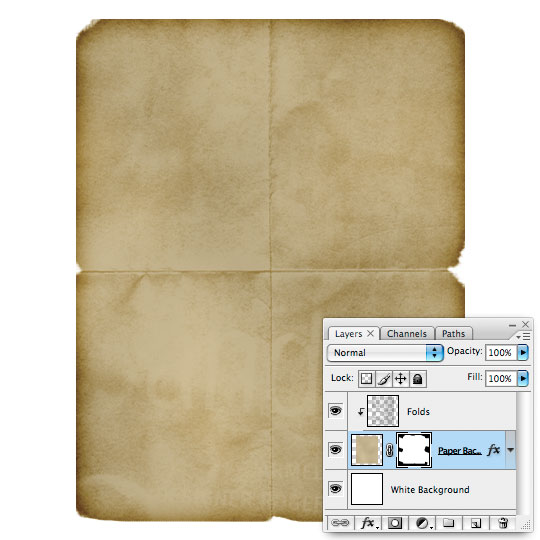
With the foreground color set to black use the brush to paint black into little sections around the edge of the paper, effectively removing those areas from view. The black we paint onto the stage with the layer mask selected will be masked away.
Step 16
With the Paper Background still selected, press the Create A New Layer icon at the bottom of the Layers palette to add a layer directly above it. Notice that the new layer is also clipped to the Paper Background layer just like the Folds layer.
Press the X key to change the foreground color to white, then using the same brush with it’s opacity set to 30% paint around the worn edges with white to add a little dimension to the wear.
Step 17
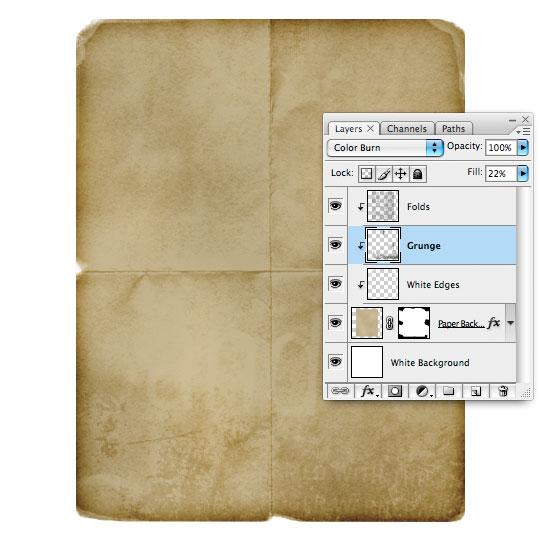
If you downloaded the grunge brushes from the Create An Old Envelope tutorial you can use them here on a new layer called Grunge to add some nice watermarks and grungy effects to the paper. I used a blend mode of Color Burn and lowered the fill opacity to 22%.
Step 18
Click back to the Paper Background layer and add a nice Drop Shadow layer style as shown below.
Step 19
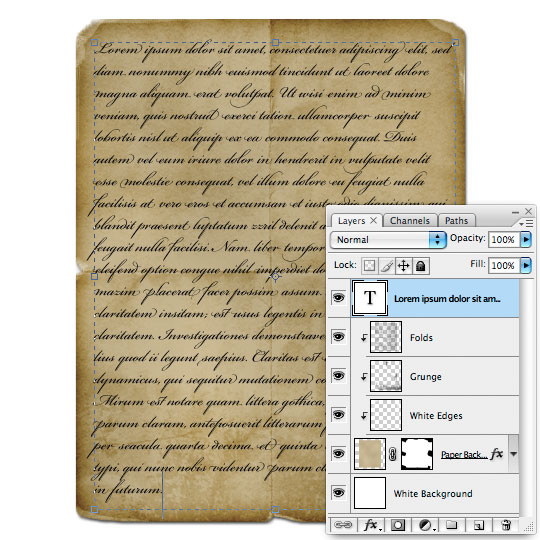
The last thing our paper needs is some writing. Click on the Folds layer (or whatever you called your top layer) and switch to the Type tool by pressing the T key. With the Type tool drag a rectangle onto the stage where the text on the paper should live then using a font like Bickham Script Pro or Champignon, type out your text.
Step 20
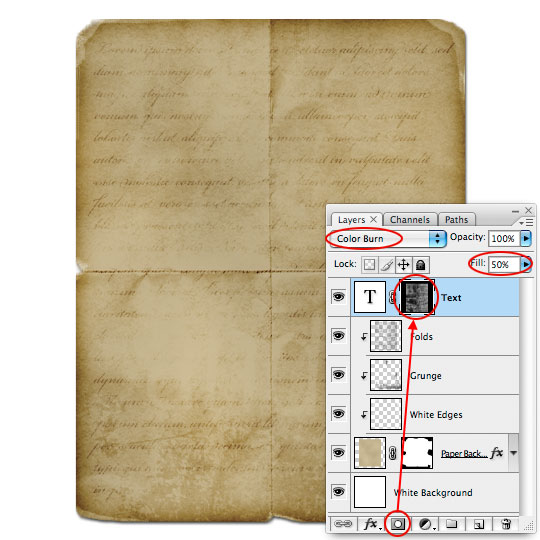
Of course we’ll need to age the text to match the paper, and luckily we’ve already done most of the preparation. Change the layer blend mode to Color Burn and lower the opacity to 50%.
While still on your Text layer hold down the Command (PC: Ctrl) key and click on the thumbnail for the Folds layer to load the layer as a selection. This will create a selection using only the information contained on the Folds layer.
Now simply click the Add Layer Mask icon at the bottom of the layers palette to convert the selection into a Layer Mask that will instantly age the text consistent with the folds and wrinkles on the paper.
Step 21
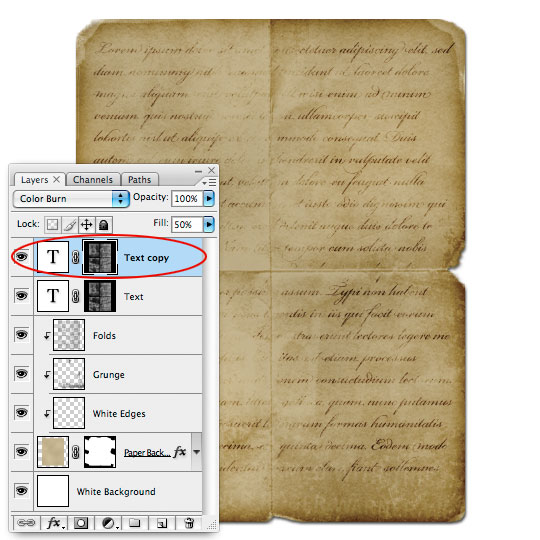
Because of the blend and opacity changes the text is now too light, so simply press Command-J (PC: Ctrl-J) to duplicate the Text layer. This will double the effects of the Color Burn blend mode as well as effectively increase the density of the text creating a more convincing effect.
Step 22
And there you have it, a nice effect produced by creating your own Photoshop Custom Brush. Nice work!
Lesson Files + Additional Resources
Download the free .PSD file and other lesson files Right Here.
Tell Your Friends
More in Graphic Design


75 Responses to Creating Old Paper With Custom Brushes
HERO
July 10th, 2009 at 9:20 am
BENJAMIN, This may be possible in GIMP, but I couldn’t tell you for sure as I’ve never used it. I do know that many of my readers are GIMP users and they find ways to do most everything there.
shahra
August 9th, 2009 at 8:36 am
Thank you so much for this tutorial,I find it very usefull !
D.R.
August 14th, 2009 at 10:55 am
As a Photoshop hobbyist I’ve done work similar to this. You really went the extra mile with respects to the detailing of this that really put some beautiful finishing touches on the piece.
It would easily pass for a photo of the real thing, thoroughly convincing!
D.R.
August 14th, 2009 at 11:19 am
P.S. Thanks for letting us download your psd too!
Tabris Chen
August 31st, 2009 at 8:42 am
Simply stunning <3
Yves Rivers
October 12th, 2009 at 8:23 am
These tutorials are Fantastic and your site design is great, it’s clean and refreshing. I rarely see a site that has great tutorials and a fantastic site themselves. Thank You.
stef
November 7th, 2009 at 1:11 pm
Great tutorial! Thanks a lot….
evilkitty75
November 20th, 2009 at 7:54 am
This 1 is beautiful, i used to make my own paper like this but i could never make a good blend for the big text but thx to u i have it thankyou so so much! xxx
Kelly
January 8th, 2010 at 5:36 pm
I have spent a lot of time on your site. It is clean, easy to navigate, lots of freebies, very very helpful, full of ideas and your imagination is just full of wonderful ideas. Thank your for creating this site.
Ben
February 4th, 2010 at 5:12 pm
Stellar tutorial. Thanks so much!
PsdDude
February 26th, 2010 at 7:29 am
PSHERO you are my HERO :) Nice tuts you have here! i enjoy very much learning from your site!
Callie Menche
March 3rd, 2010 at 9:03 am
Where did you get the red background??
HERO
March 3rd, 2010 at 5:53 pm
CALLIE, I made the background with a simple repeating pattern. Check out my tutorial on the subject HERE
Jessica
March 6th, 2010 at 6:21 am
You make a daunting task easy as pie! Speaking for the ladies out here using your site, you make it easy for us to do our digital scrapbooking design! A lifted edge tutorial would be the bomb, if you ever feel so inclined! Your tutorials have brought a new level of greatness to my designing work and just wanted to say “Thank you” from the bottom of my little Georgia Pea Pickin Heart!
toxa
March 18th, 2010 at 1:50 am
thanks for tutorial :)
Antony
March 19th, 2010 at 1:51 pm
Great stuff! Thanks man.
Dyannamika
April 4th, 2010 at 8:04 pm
I think you’re my new art hero!
dungno
April 10th, 2010 at 11:21 pm
Great tutorial!!
massimiliano falduto
April 22nd, 2010 at 2:38 am
Nice tutorial, I have to thank a lot You cause I solved my problem with this tutorial to create a nice texture background.
Thank You
wiyono
May 1st, 2010 at 4:07 am
great tutorial. thank you.. i have succes create them..
ince
June 4th, 2010 at 1:27 am
the tutorial was superb and simple! thanks a lot and keep it coming!
surajit sarkar
July 14th, 2010 at 1:10 am
very cool design ………
Pinyon
July 14th, 2010 at 6:24 pm
I’m having trouble at Step 20 (aging the text). When I have both the text layer and the folds layers selected, the Add Layer Mask icon as well as Layer > Add Mask are grayed out.
Any suggestions?
HERO
July 19th, 2010 at 7:55 am
PINYON, Try adding the layer mask to one layer at a time.
Khalid Majid Ali
February 12th, 2011 at 11:45 am
Great tutorial, to the point and an awesome result.