


2 Step Grunge Photo Effect
In this tutorial I'm going to show you a quick and easy 2 step process grunge photo effect that I stumbled upon while attempting to accomplish something completely different. That's right, I'm going to teach you a happy accident.Step 1
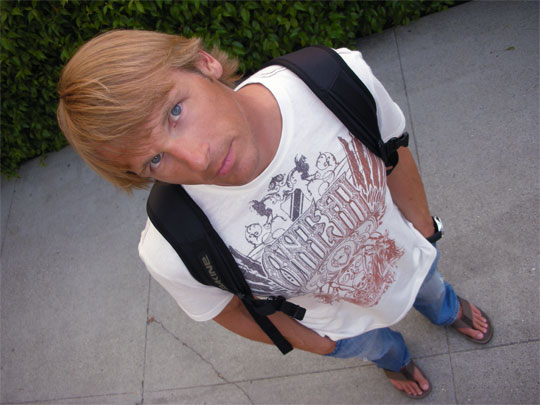
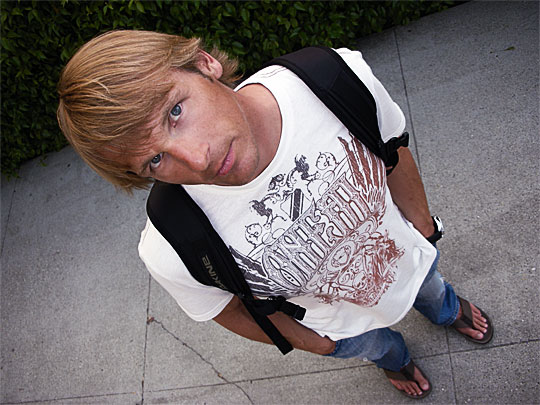
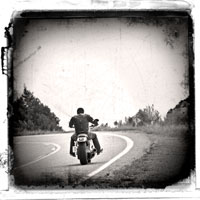
Obviously a photo effect requires a photo. I find this effect works awesome on photos of people, so here’s a photo of this funny looking surfer I know.
Step 2
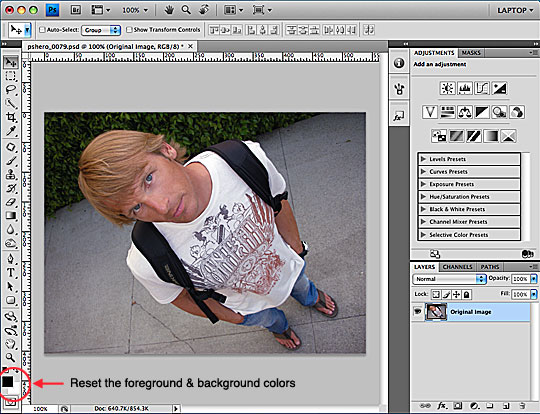
With the photo open, lets first make sure our foreground and background colors are set to Black & White by pressing the D key (notice that the swatches at the bottom of the Tools palette have now been reset to their default B&W).
Step 3
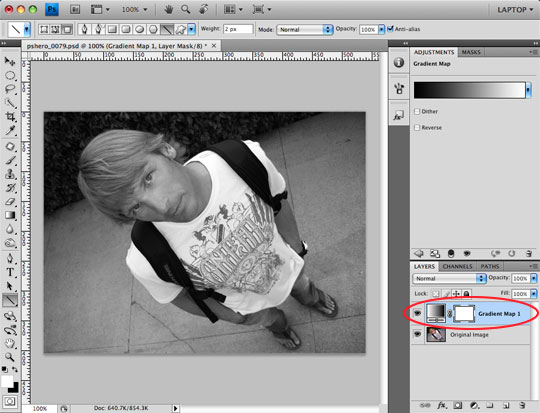
Now lets add a Gradient Mask Adjustment Layer by either selecting it from the Adjustment palette, or by clicking the little half-white/half-black circle at the bottom of the layers palette. This will create a new layer above your photograph in the Layers palette called Gradient Mask and you will notice that the photo has turned Black & White.
Step 4
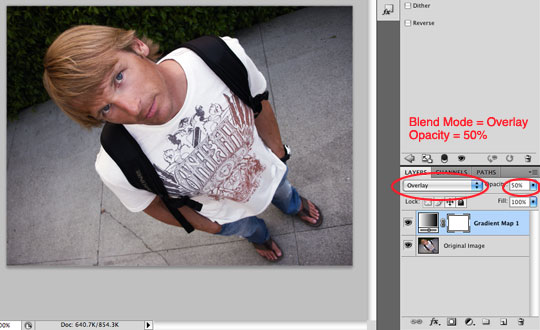
To complete the first step in the process, go ahead and change the Layer Blend Mode at the top of the Layers Palette for your Gradient Map layer to Overlay and lower it’s opacity to 50%.
The Gradient Map is now being used to dull the colors, while the Overlay blend mode multiplies the highlights and screens the shadows adding a unique contrast to the image.
Step 5
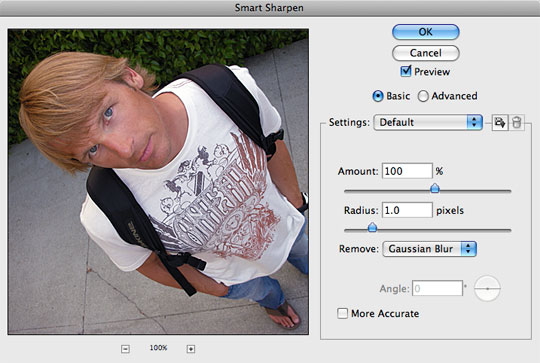
The second step in this little lesson is even easier than the first. Click on the layer containing your photo in the Layers palette so that it is selected and from the main menu choose Filter>Sharpen>Smart Sharpen. Depending on your image size, you’ll need to play around here a bit but for the small 540×400 px image I’m using for this tutorial I’m going to use an Amount of 100 and a Radius of 1.0. For larger images you will want to increase the Amount, but I wouldn’t go too much farther over 1.5 or 2.0 with the Radius.
(*note: In the Smart Sharpen dialog box, the adjustment layers above won’t be visible, only the layer you’re sharpening.)
Step 6
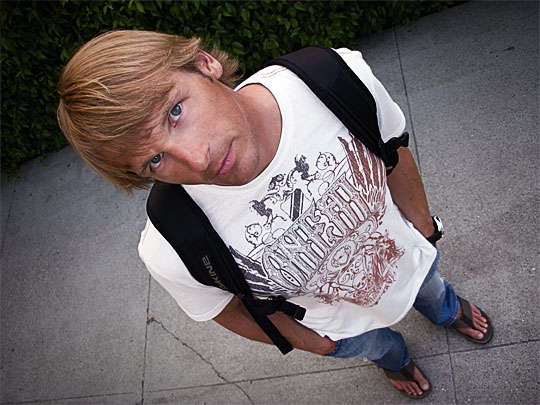
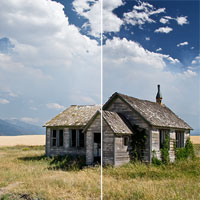
And there you go, in two steps you’ve added a cool grunge, almost HDR effect to an otherwise ordinary photograph.
Step 7
If it were me… and it is… I would add a layer at the top of the Layers stack, switch to the Brush tool by pressing the B key, choose a large soft-edged round brush from the Brush picker, lower the brush opacity to around 10% and lightly paint a slight vignette into the corners of the photo to darken them and bring more attention into the subject… but that’s just me.
Be careful not to go overboard with this as it can go from cool to overdone in a jiffy.
And that’s it folks. The moral of the story here is that sometimes just plain screwing something up can turn out to be a cool little effect that works on a lot of photos, not just people. Or something like that.
Lesson Files + Additional Resources
Download the free .PSD file and other lesson files Right Here.
Tell Your Friends
More in Photo Effects


34 Responses to 2 Step Grunge Photo Effect
Arvin
July 18th, 2009 at 5:20 pm
Very cool, like a skate magazine photo shoot.
Margarita N.
July 19th, 2009 at 8:22 am
You are back!!!
Chris Bailey
July 20th, 2009 at 10:50 am
Sweet, Simple, and Useful. thanks hero! glad to see a new tutorial keep em’ comin!!
Paulo Sales
July 20th, 2009 at 3:48 pm
Welcome back Hero !
Nice tut
Tien
July 20th, 2009 at 7:23 pm
Cool. Keep going Hero. We r waiting for new tutorials
By the way,I’m an architecture student, so I wanna learn some stuff that can make 3d objests or we can add materials in the objects but rarely tutorials teach that. Yeah, anything we can use for architecture. Just a suggestion.
Yeah. Ur tutorials r still cool.
HERO
July 20th, 2009 at 8:39 pm
Thanks Paulo. Great to see your name come up again.
Andrea
July 22nd, 2009 at 4:29 pm
Awesome effect! Keep ’em coming! I’ve missed them lately.
Gilberto
July 22nd, 2009 at 8:06 pm
Welcome back! Great tut!
Curetonian
July 23rd, 2009 at 11:38 pm
Good to see you back in action Hero, quality as always.
Katherine Weaver
July 24th, 2009 at 6:19 am
You’re back – woohoo!!!! ;)
Jen D.
July 25th, 2009 at 8:17 am
Thanks for another great tutorial! Love the effect.
Alexander
July 25th, 2009 at 11:12 am
The way you progress is extraordinary – Your tutorials don’t read like those dry lectures. I’ll definitely get back!
Page Gardens
July 25th, 2009 at 6:54 pm
Very subtle effect, very nice! Do you come up with these yourself?
Style Swamps
July 25th, 2009 at 6:55 pm
Nice effect!
Blast Balastik
July 25th, 2009 at 8:38 pm
Welcome back!
Very cool tut, very useful to use in photos ;)
Sacha
July 25th, 2009 at 10:57 pm
Nice tutorial, and nice to see you back in my rss reader ! Your tutorials always showcase great skills, even when they are that simple !
Tim
July 27th, 2009 at 7:01 am
Hi Hero, great site. Big fan of your tutorials!
Purehany
July 28th, 2009 at 4:10 am
Great job!
Cl?©ment
July 28th, 2009 at 9:00 am
Our awaited Hero is back ? I can’t believe it ;).
Please keep them all coming !
Ask Me
July 30th, 2009 at 12:04 pm
Welcome back Hero! We’re all excited to have another great PSHero tutorial.
Blog Evangelist
July 31st, 2009 at 8:17 am
Thanx! Cool Shirt. Where did you buy it?
HERO
July 31st, 2009 at 10:03 am
BLOG EVANGELIST, I’ve now had that question come through 3 times, so here’s the public answer. I got the shirt at a surf shop in Santa Barbara called The Beach House. The shirt is called the O’Neill Vaporous Gray Darko Custom T-shirt and while they last you can get them here: http://www.surffanatics.com/cat/pro/O%27Neill_Vaporous_Gray_Darko_Custom_T-shirt
Patricio
August 1st, 2009 at 10:21 am
Your examples are sooo helpful. I have learned a lot from them. You do always a so perfect job. I hope you ad more in future. Thanks for sharing this trix whit us.
Aniki
August 5th, 2009 at 5:16 am
Sensei!!! I have long been waiting for your arrival!! I miss you!
Denver Photographer
August 7th, 2009 at 9:24 am
ooooh I’m definitely going to have to try this now. That has a neet feel to it. I’m suprised by its simplicity. Nice work.
Tom
August 29th, 2009 at 6:03 am
Very simple, but amazingly effective technique will be using this when ever I want to add edge to my photos. Great work!
Thomas Scott
October 17th, 2009 at 6:02 am
Hey – who is that grungy dude in the photo? Nice tutorial, great steps
Arman
October 22nd, 2009 at 10:32 am
WOW .. u r too good..u totally read my mind.. i’m addicted to dis site.. thanks so much but pls show us more of people pics effect.
Michael
October 30th, 2009 at 12:41 pm
Funny story…I found that exact same technique exactly the same way. It’s fun if you also use a colored gradient (I like to use a sepia toned gradient).
Nikki
November 17th, 2009 at 7:44 am
Sweet.
Thank you!
andrii
November 25th, 2009 at 5:55 am
awesome result… i really like this :) thnx Hero!!!
GL
January 25th, 2010 at 12:33 pm
What an amazing site !
Free Fonts & Tutorials
February 16th, 2010 at 6:01 am
A nice grundge text effect would go great with this, magazine material! Skater magazine that is :p
Mark Armstrong
May 25th, 2011 at 7:08 am
Lovely and brilliant, and beautifully explained– thank you!