

Creating Custom Patterns
In this Photoshop tutorial we will explore the wonderful world of repeating patterns while creating one from scratch using a Photoshop Custom Shape.In this Photoshop tutorial we will explore the wonderful world of repeating patterns while creating one from scratch using a Photoshop Custom Shape.
Those of you who’ve been here before have probably noticed my affinity for elaborate and decorative backgrounds in my projects and I’ve received quite a few requests for a tutorial on the subject… so without further adu, here you go my naughty little monkeys!
Step 1
The first step in creating a good repeating background is an organized working document, so lets set one up now. Start by creating a new document with a white background.
Not all repeating backgrounds are the square variety, in fact some of my most elaborate are rectangle, but to start lets stick with symmetry. Create a new layer by clicking the Create A New Layer icon at the bottom of the layers palette and then grab the Rectangular Marquee tool by pressing the M key and drag out a nice sized selection on the stage. It doesn’t have to be centered or anything, this will just help us define our work area.
Press the D key to set the foreground color to black (or pick any color you like, it’s not important at this juncture just as long as it stands out from the background but you know how I feel about purple). Then fill the selection with color by pressing Option-Delete (PC: Alt-Backspace).

Step 2
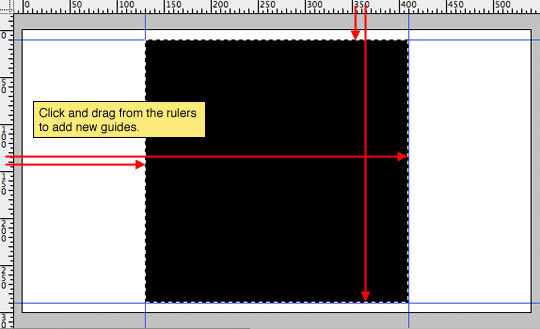
If your Rulers aren’t visible at this time, press Command-R (PC: Ctrl-R) to bring them up. Now lets click and drag guides from the rulers onto the stage. We want a guide for each edge of our selection, and by default the guides will snap into place nicely when they get close to the edge of the selection.
Step 3
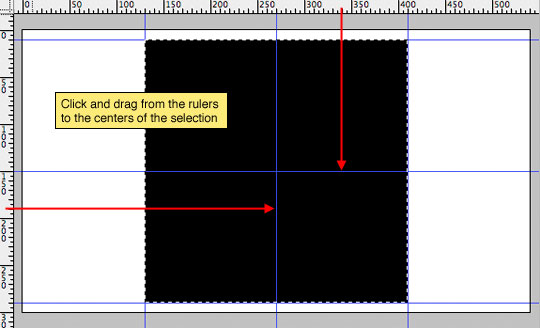
While we’re setting guides and still have the selection active lets also drag them into the center of the selection where they should snap into place as well.
(*note) If your guides aren’t snapping into place, choose View from the main menu and select Snap. You can also use the Snap To item in the same menu to designate what will snap.)
Step 4
Our colored square has served it’s purpose, so lets delete it by pressing Delete (PC: Backspace) and then deselect by pressing Command-D (PC: Ctrl-D). The layout is now complete and we can move on to build the pattern. We’re also done with the rulers, so if they’re bugging you press Command-R (PC: Ctrl-R) to hide them.
I’m going to change the color of my guides at this point to make them less distracting. You can do this by choosing Photoshop from the main menu, clicking Preferences and then choosing Guides, Grid, Slices and Count.

Step 5
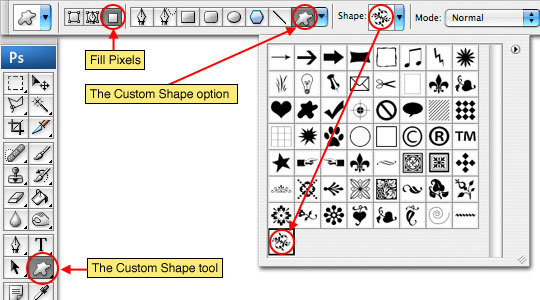
Press the U key to call the Custom Shape tool. Make sure that Fill Pixels and Custom Shape are chosen from the Custom Shape options bar and then choose a shape from the drop down menu. The shape I chose is a sort of victorian swirl from a collection of custom shapes I have laying around for a situation just like this… and yes, of course I’ve included it in the download at the end of the lesson in .csh form so you can load it right into your custom shapes palette and follow along if you’re so inclined.
Step 6
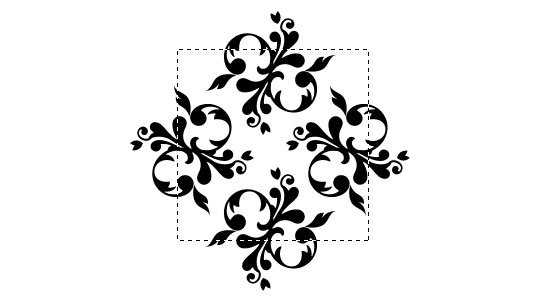
Press the D key to insure that your foreground color is black and then click and drag on the stage to lay down the custom shape. Holding the Shift key while you drag will constrain the proportions and keep things nice and tidy. I’m also being careful to keep my shape within the bounds of one of the four boxes we created with our guides earlier. This will ensure that we can replicate the pattern within the space correctly.

Step 7
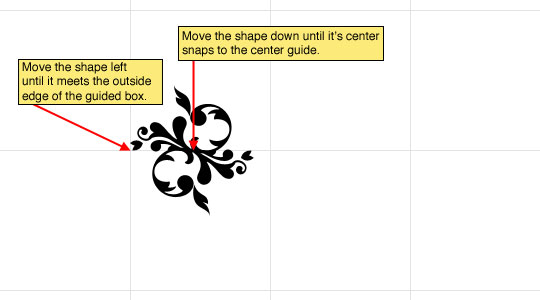
It’s time to position this little guy for replication, so I’m going to drag it to the left edge of the big square of guides and down until its center snaps to the horizontal center guide. Wow, that sounded confusing. Check out the graphic below if that went over your head.
Step 8
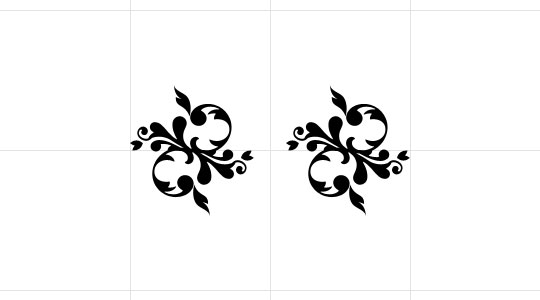
Now lets duplicate the layer and setup the right side of our pattern. Press Command-J (PC: Ctrl-J) to duplicate the layer, then drag the shape to the right edge of the guided box. Holding the Shift key while you drag will keep the movement on a perfectly horizontal plane.
Because my shape is semi symmetrical and I want the centers of the design to look pretty, I’m dragging my shape to the other side, but not flipping it horizontally or vertically. If we used a shape that wasn’t symmetrical this may be necessary and could be done using the Edit>Transform>Flip Vertical (or Horizontal) options in the main menu.
Step 9
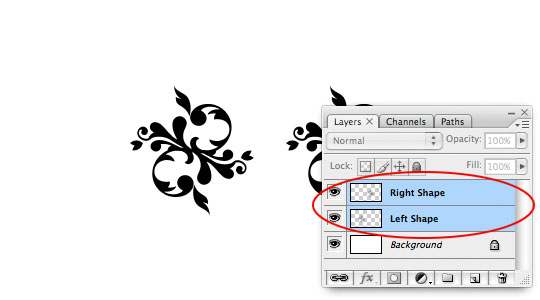
Ok, now we need to create our top and bottom portions of the pattern. For this I’m going to hold down the Command (PC: Ctrl) key and click down to the first layer we created, effectively selecting both layers at the same time.
Step 10
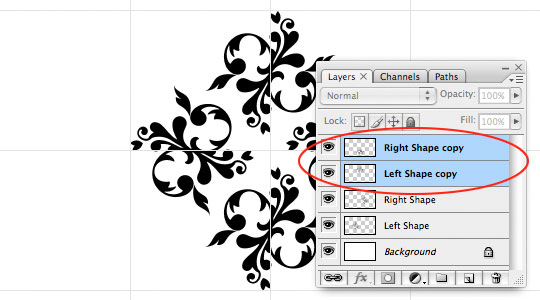
Command-Click (PC: Ctrl-Click) on one of the two selected layers and choose Duplicate Layers. (*note: Because we’ve got more than one layer selected, the standard Command-J (PC: Ctrl-J) keyboard shortcut won’t work.)
Click OK when the dialog comes up asking you to name the layers (although you should name them once they’re where we want them). You will notice that now we have two new layers created above our originals and they are by default both selected. While they’re both selected choose Edit>Transform>Rotate 90° CCW from the main menu.
Step 11
We’re now finished with our guides, so you can press Command-H (PC: Ctrl-H) to hide them because the tricky part is coming up and we don’t want anything obstructing our view.
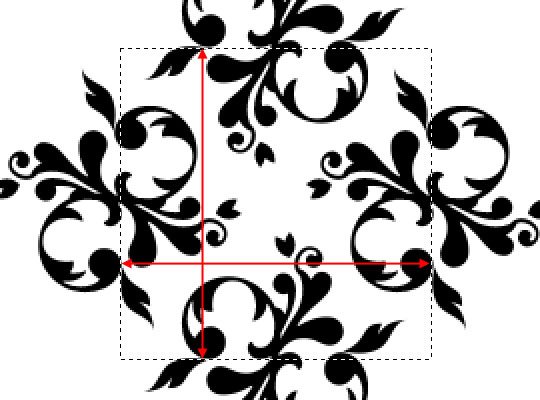
Press the M key to call up the Rectangular Marquee tool and drag a selection around the approximate middle of our new pattern, don’t worry if it’s not exact because we’ll modify it in the next step. As always, the holding down the Shift key will constrain the selection.
Step 12
I’d suggest zooming in on the pattern until it’s as large as you can get it while still being able to view the whole thing. At this point every pixel matters and if we don’t make this selection perfectly the pattern will end up matching up poorly and then you’ll just feel silly.
Choose Select>Transform Selection from the main menu. This will give you the same transformation controls that you’ve used before using Free Transform, but this time all we’re transforming is that nice square selection. Our goal is to bring the sides in until we can see that they will line up perfectly with the opposite side when the pattern is tiled. I find it’s best to find a common bold feature on one side and place the selection at its edge, then drag the opposite edge to the corresponding spot.
Step 13
Once your selection is perfect press the Return (PC: Enter) key to commit the transformation to the selection.
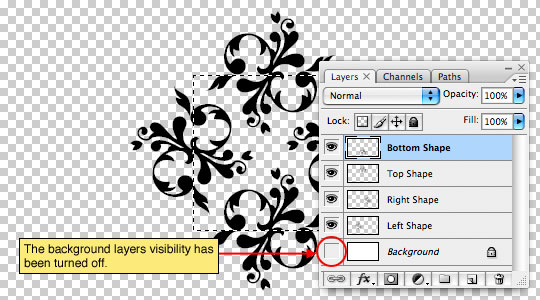
Since we want this pattern to work perfectly on any background, we need to get rid of the white background layer. You can either delete the layer, or just click on the little eye icon next to the layer in the layers palette to turn its visibility off, either is fine. With the background gone you’ll see the classic Photoshop checkerboard pattern in the background telling you that all that space is going to be transparent in our final pattern.
Step 14
From the main menu choose Image>Crop and then press Command-D (PC: Ctrl-D) to deselect.
And our final step in the creation of the pattern is to choose Edit>Define Pattern from the main menu. Give your pattern a name and click OK. At this juncture the pattern has been stored in Photoshop and technically we don’t need this file anymore, but I usually keep it open until I’ve tested the pattern. Lets do that next.

Step 15
Open a new document with a white background big enough that you will be able to see multiple tiles of the pattern. Create a new layer and choose Edit>Fill from the main menu. When the Fill dialog pops up choose Pattern from the drop down menu in the Contents area and then choose your new pattern from the Pattern Picker (it should be the very last one). Click OK and the stage will be filled with your pattern.
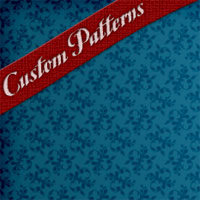
If everything looks right, your pattern is ready to use, if not you should probably take a break, get something delicious to eat, then come back and try to figure out where you went wrong. As luck would have it, mine turned out perfectly.

Step 16
Ok, how bout some real world use for our new pattern? I’m not sure why I’m asking you… since I’m going to go ahead and do it anyway, but whatever.
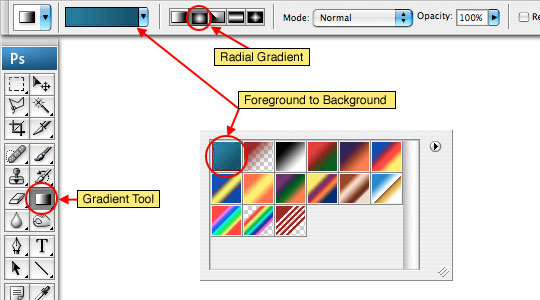
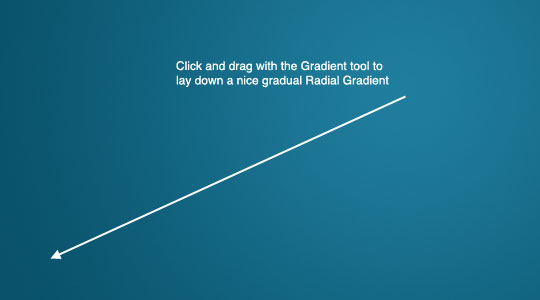
Open a new document and lets put down a pretty radial gradient in the background. Set the foreground and background colors to #207e9e and #09526c respectively. Press the G key to invoke the Gradient tool and choose Foreground to Background and Radial Gradient from the gradient options bar at the top.
Step 17
Click and drag to create a nice gradual Radial Gradient on the stage.
Step 18
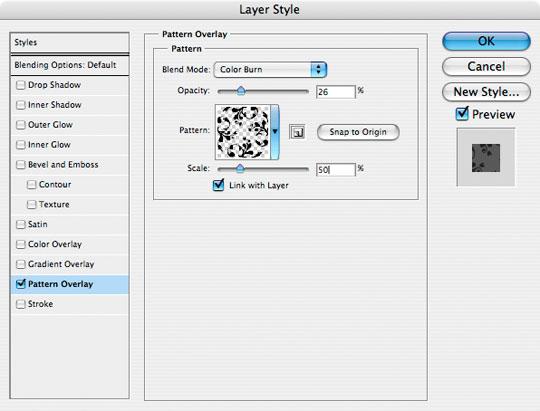
Ok, lets explore another (and much better) way to use a pattern. Yes, I’m talking about adding a layer style, so go ahead and double click next to the name of your layer in the Layers palette to bring up the Layer Styles dialog. (*note: You can also Control-Click (PC: Right-Click) on the layer and choose Blending Options from the menu to access this dialog).
(*note: If you double click on the Background layer (which is by default locked), you will get the New Layer dialog box pop up. Don’t worry, give it a name and click OK, then double click again to pull up the Layer Styles dialog.)
Click the option on the left hand side called Pattern Overlay (click on the words, not the check box, otherwise you won’t be shown the Pattern Overlay options window).
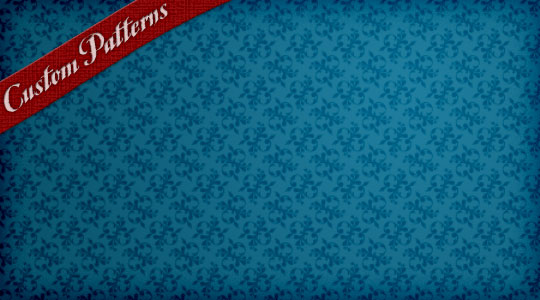
Choose the new pattern by clicking on the Pattern picker (again, it’ll be the last one at the bottom). This is where using the Pattern Overlay feature outshines simply using the Fill dialog because we can now change the blend mode for our pattern as well as change it’s opacity and scale. I’m going to switch the blend mode to Color Burn (because it will interact with the gradient better), lower the opacity to 25% and change the Scale to 50%.
Step 19
Hopefully you’ve come up with something you can use, if not, you can always try, try again. Patterns are an extremely useful and often overlooked design element but when used properly they’ll bring you fame and fortune… well maybe not fame, but fortune for sure. That’s ok though because fame is overrated anyway.
Lesson Files + Additional Resources
Download the free .PSD file and other lesson files Right Here.
Tell Your Friends
More in Graphic Design


55 Responses to Creating Custom Patterns
majed
October 13th, 2009 at 7:24 am
what a great site and tips here thx
Rachel
November 5th, 2009 at 4:36 pm
THANK YOU!!!
Tracey
December 29th, 2009 at 10:18 am
thanks buddy!, have some happy surfing times. This was supa tute!
Ehis
December 4th, 2010 at 1:19 pm
Thank you so much. God bless you really good. i love your simple way of teaching. thank u Hero
Alexis
July 27th, 2011 at 10:26 am
Thank you very much! A great resource for brackgrounds and a lot of uses.