


Complex Repeating Patterns Part II
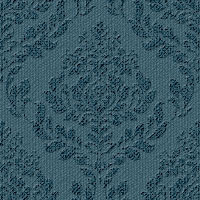
In this second installment we'll take the pattern created in Part I and use it to create a heavy damask fabric by adding layer styles and a few unique layers.Step 1
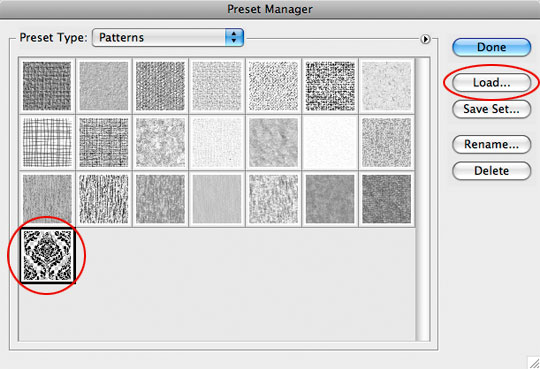
If you didn’t download the source file for Part I and want to follow along simply download .pat file here. Install the pattern by choosing Edit>Preset Manager from the main menu, choose Patterns from the drop-down-menu and press the Load button on the right hand side of the dialog. Navigate to wherever you saved the downloaded .pat file, select it and press OK to load the pattern into Photoshop.
Step 2
Now that the pattern is loaded lets go ahead and open a new document in Photoshop (mine is 540x400px at 72ppi). Although the dimensions of your file don’t matter, if you’re using a higher resolution you’ll need to make slight adjustments to the layer styles we apply along the way.
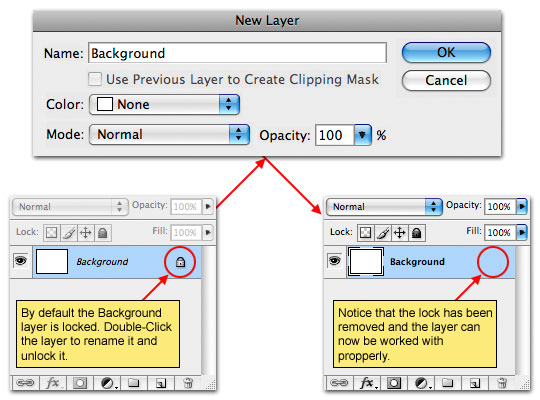
By default the background layer of a new Photoshop document is locked. Double click on the Background layer and rename it to unlock it (I usually just rename it Background again but you can call it Elmo or George if you’d like).
Step 3
The first item of business is somehow get our pattern onto the stage where we can work with it. You could choose Edit>Fill from the main menu and fill the layer with the pattern, but you’d loose some of the valuable adjustments that are gained by using a Layer Style to add the pattern instead, so we’re going to do it that way instead.
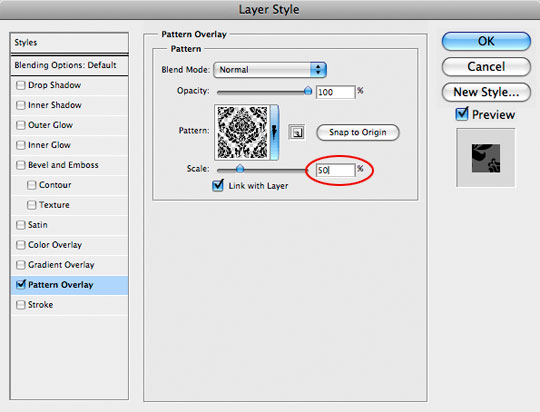
Control-Click (PC: Right-Click) on the Background layer in the Layers palette and choose Blending Options from the menu. Select Pattern Overlay from the list of style options on the left, choose the pattern we loaded into Photoshop in Step 1 (it should be the last pattern in the Pattern Picker).
One look at the stage will tell you that the pattern (at least for this document size) is far too large, and here’s where using a Layer Style comes in handy… Take the Scale slider at the bottom of the Pattern Overlay style options box and slide it down to 50%. Here’s another little tip for you – if the pattern isn’t set on the stage the way you like it, just click and drag it on the stage to a position that’s more pleasing before closing the Layer Styles dialog box. Once it looks the way you want press OK to commit the style.
(*note: I’ve found that the Scale slider in the Pattern Overlay style dialog works best at even divisions of 100%, so 75%, 50%, 25% and 12.5% will yield the clearest and least pixelated results.)
Step 4
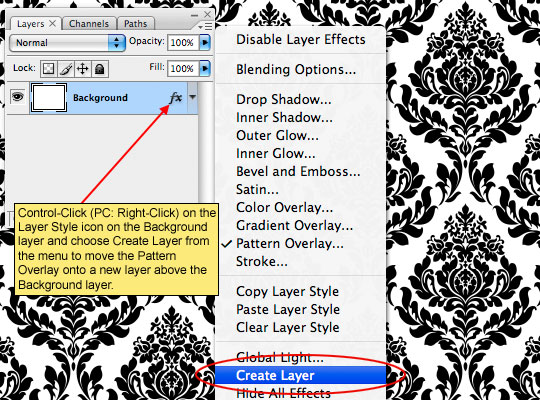
Now we have the pattern added to the background but we don’t have any way to work directly with the pattern itself. To solve this problem we’ll now move the pattern onto it’s own layer. Control-Click (PC: Right-Click) on the layer style icon inside the Background layer and choose Create Layer from the menu. This will take the layer style we just applied and break it into layers that are clipped to the Background layer. In this case it creates a new layer above the Background layer called Background’s Pattern Fill.
Step 5
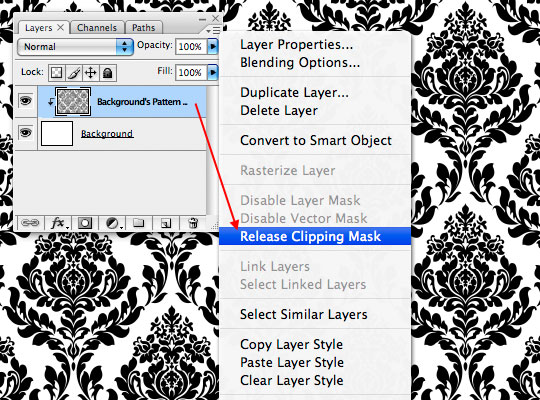
We don’t actually want this new layer clipped to the Background layer, so lets release the clipping by Control-Clicking (PC: Right-Click) on the Background’s Pattern Fill layer and choosing Release Clipping Mask.
Step 6
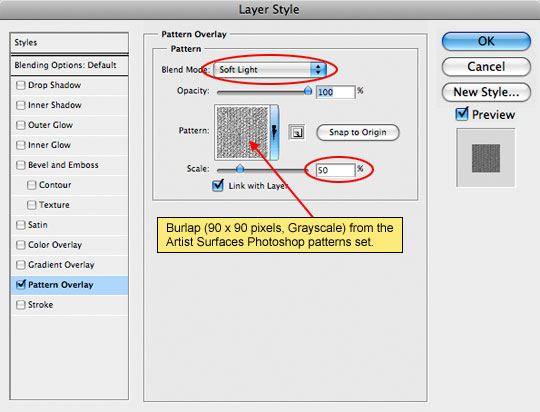
Now we’ve got our document setup and are ready to start adding the styles that will create the look and feel of our heavy damask fabric. Lets start with adding some color and and texture to the Background layer.
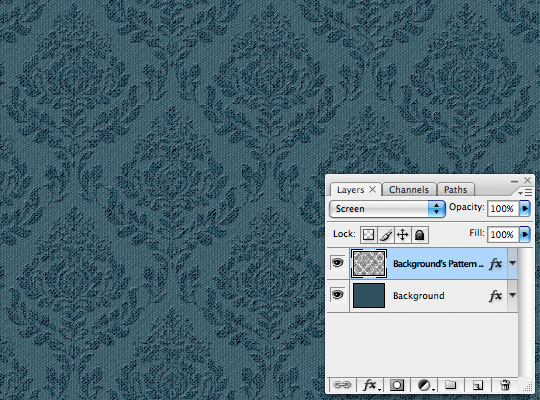
Click on the Background layer in the Layers palette to select it as the working layer. Change the foreground color in the Tools bar to something nice and subtle, anything except purple is fine… by now you know my rule about purple. I chose a nice blue color #30505d. Press Option-Delete (PC: Alt-Backspace) to fill the Background layer with the pretty new color and add the following Pattern Overlay layer style.
The pattern used here is called Gauze
Step 7
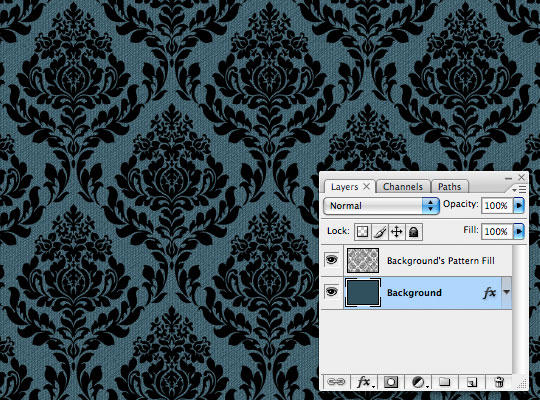
After adding the color and pattern overlay to the Background layer this is what my document looks like so far.
Step 8
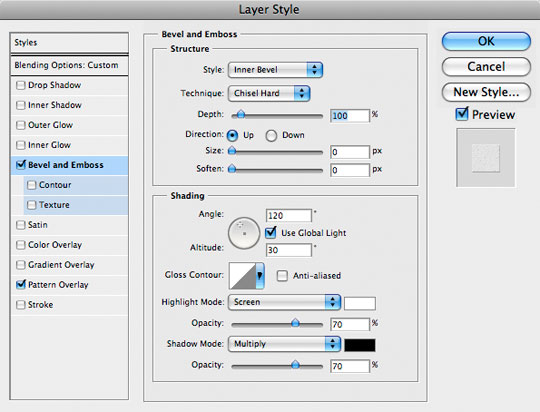
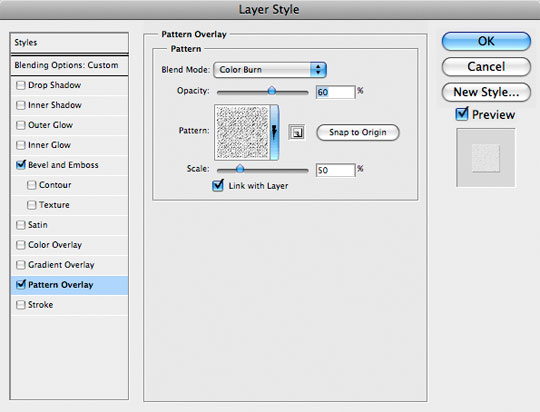
Click on the Background’s Pattern Fill layer in the Layers palette to select it as the working layer and add the following two Layer Styles. By adding a different Pattern Overlay and a slight Bevel and Emboss we can make the pattern look as if it stands off the base fabric and is heavier and darker. These two layer styles are both rather subjective and you can get cool results playing around with the settings, patterns and blend modes of each so don’t be afraid to experiment.
Here are my style settings. Be careful to check each setting and slider as many of them have been adjusted.
Step 9
Again here is what my document looks like after adding the Pattern Overlay and Bevel and Emboss to the Background’s Pattern Fill layer.
Step 10
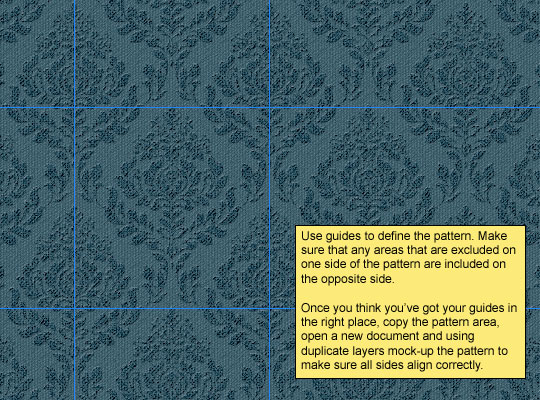
With our texture and color added we can now select an area to define as a repeating pattern just like we did in Part I (Steps 13-14) by setting guides at each edge of the repeating pattern. It helps to really zoom-in on the pattern so that you can see each pixel to make each guide exact.
Using guides to define the pattern make sure that any areas that are excluded on one side of the pattern are included on the opposite side.
Once you think you’ve got your guides in the right place, copy the pattern area, open a new document and using duplicate layers mock-up the pattern to make sure all sides align correctly.
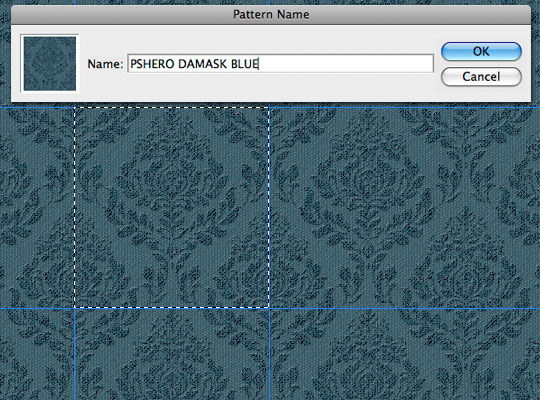
Step 11
Once you’re sure your guides are in the right place make a selection of the pattern and choose Edit>Define Pattern from the main menu. Your new pattern will now appear in the Pattern Picker ready to use in your next project.
At this point I’d recommend saving your file incase you decided you want to change anything on it later. Simply filling the Background layer with a different color will change the coloring of the entire fabric pattern and you can save that pattern for future use as well.
Step 12
In the download at the end of the lesson I’ve included a .pat file with the basic pattern as well as a blue and red version for your use. I hope you’ve learned something useful!

Lesson Files + Additional Resources
Download the free .PSD file and other lesson files Right Here.
Tell Your Friends
More in Graphic Design


18 Responses to Complex Repeating Patterns Part II
leonardo
July 24th, 2008 at 11:59 am
Very good!
awesome
*first!
Bill Goodman
July 24th, 2008 at 5:47 pm
What would it take to transplant your photoshop knowledge into my my brain? Maybe just copy and paste the info? Once again more great stuff from ya!
Paulo Sales
July 24th, 2008 at 6:09 pm
after this…dont worry Hero, no more pattern email .
5*****
Drupal Museum
July 24th, 2008 at 7:14 pm
Awesome tutorial! I can’t tell you how many hours I’ve spent looking for the perfect pattern… I guess now I’ll spend just as many hours making the perfect pattern ;)
Thanks for all the work you put in to that!
Tom
July 25th, 2008 at 1:43 am
Nice tut, good job and beautiful pattern.
Thanks !
Marotzke
September 26th, 2008 at 1:56 pm
Very nice! This looks just great :-)
Chris Walter
October 12th, 2008 at 1:26 pm
I know you probably heard this about a billion times but You are My Hero!
PS Quilter
December 17th, 2008 at 10:56 pm
I’m on my way to redoing (Adobe Style) my living room (in photo form!) haha.
I just need a tut on how to take this tut and convert to a 3-D form… placing fabric design over a chair, etc..
Apholstery Adobe style anyone? :)
This is so cool HERO.
Thanks for sharing this.
Honey
January 10th, 2009 at 1:28 pm
You are my hero!
Chris
February 12th, 2009 at 4:43 pm
Wow, you are truly a master. I have they are many tutorial sites on the net, but none of them do the graphics you do. Then again, they might not want to share those ideas, which you clearly do.
Keep up the good work!
Umi
April 19th, 2009 at 3:45 pm
Thanks for all your tutorials. I found a few PS tutorials but none of them are as easy to follow as yours. I find your tut really easy to follow and understand. Keep up the great work!!!
Mark
May 8th, 2009 at 9:54 am
PSHERO is the man. What an eye for design. Great tuts, keep up the good work.
Purba
June 5th, 2009 at 12:52 pm
Thanks from Indoneisa for an excellent tutorial- we have used this one to modernise the “old school” method- where we previously scanned our hand-drawn, cut paper.
Phew- no more running to photocopier!
paul
June 6th, 2009 at 12:03 am
This is easily one of the best tut’s I’ve even seen! Don’t stop.
Owen
September 8th, 2009 at 3:25 am
Great tut. Can you give an indication of how you did the stitching on the final image?
Cho-Lung
September 26th, 2009 at 11:36 am
You are a star!!
Awesome, one of the best tutorials I’ve ever seen.
Top level quality results and perfectly explaind, just great.
THANKS SUPER HERO!!
EmileQ
January 2nd, 2010 at 11:25 am
Thanks You For All Your Tut.
Phillip Winn
March 17th, 2010 at 3:37 pm
In step 8, it’s important to change the Blending Options from Normal to Screen. At least I found it important!
This is simply amazing stuff. You’re my hero, pshero!