


An Exercise In Quick Masks and Color Halftones
In this Photoshop tutorial we are going to explore some cool ways to use Quick Masks and the Halftone Pattern filter. We will first examine the technique, then I'll show you a few ways to apply it.Step 1
Lets get started by opening a new document. For the sake of being on the same page just make sure you’re working at 72ppi so my filter settings will work the same for you later in the lesson.
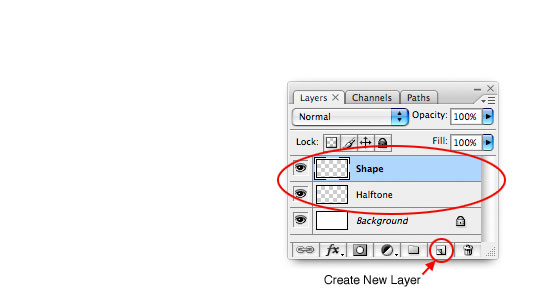
Lets leave the background layer white for now and add 2 new layers by hitting the New Layer icon at the bottom of the Layers palette. Name these layers Shape and Halftone respectively because I’ll be referring to the layers by names as we work.
(*note: If your layers palette isn’t visible, you can open it by choosing Window>Layers from the main menu.)
Step 2
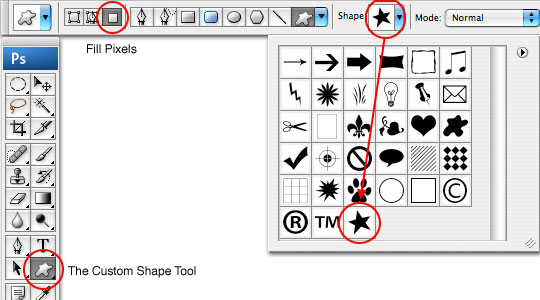
With the Shape layer selected lets draw an object on the stage. For my example I’m going to use the star I use in the PSHERO logo. I’ve made the star into a Custom Shape which I can now retrieve anytime I need to use it by choosing the Custom Shape tool from the tools bar and then selecting the star from the Custom Shape gallery as shown below. Be sure that the Fill Pixels icon is checked.
Step 3
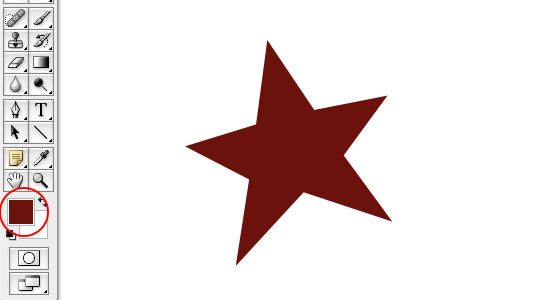
Now I’m going to choose a nice red as my foreground color (#6b120c) and click and drag my shape onto the stage. Remember that by holding down the Shift key you can constrain your shape.
Step 4
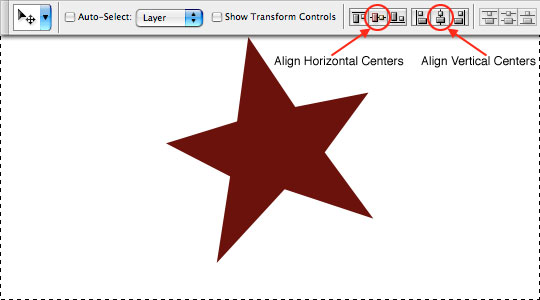
Here’s a neat little trick if you ever want to center something to either to whole stage or to the center of any selection:
Press Command-A (PC: Ctrl-A) to select the entire canvas. Now switch to the Move tool by pressing V. When you switch to the move tool, you will notice a new set of options appear at the top of Photoshop, a few of which are the Align commands. If you press Align Horizontal Centers and Align Vertical Centers icons, your shape will be moved to the exact center of the selection. If you didn’t already know that little trick, I bet you’re doing your happy dance about now… or maybe that’s just me.
Step 5
Ok, enough monkey business, lets get to the meat of our tutorial.
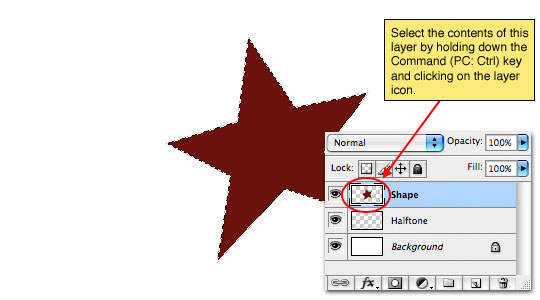
Holding down the Command (PC: Ctrl) key, click on the icon in the Shape layer in the Layers palette to load the shape as a selection. From the main menu choose Select>Modify>Expand and when the dialog box pops up enter 10 pixels and press OK. Now feather the selection by choosing Select>Modify>Feather from the main menu. Use a setting of 15 pixels and click OK. (*note: In Photoshop CS2 the Feather option is in the main drop down under the Select header in the main menu. In CS3 it was moved to the Select>Modify sub-menu.)
Step 6
With the selection made, expanded and feathered it’s time to enter Quick Mask Mode by simply pressing the Q key on your keyboard. You’ll notice that everything outside our selection turns pink (because it’s masked) and that because we feathered the selection, the pink mask gradually dissipates as it enters the selection.

Step 7
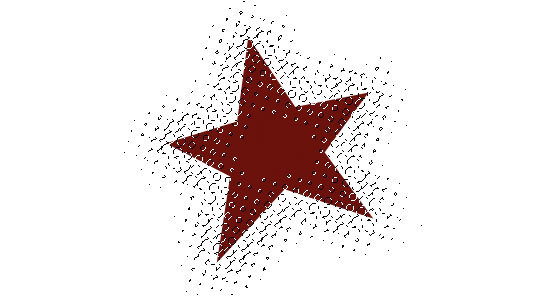
From the main menu choose Filter>Pixilate>Color Halftone and set the Max Radius to 8 pixels and leave the other settings at their default (the default should be 108/162/90/45) and click OK. Now the area where we had our gradient before has been converted to a series of expanding dots (halftone).

Step 8
Exit Quick Mask Mode by pressing the Q key again and instantly the area that was transparent during our masking process is converted into a selection. How awesome is that?
Step 9
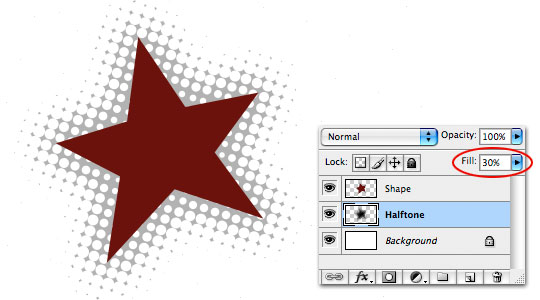
In the Layers palette click on the Halftone layer to select it. Press the D key on your keyboard to reset the foreground color to black and then fill the selection by pressing Option-Delete (PC: Alt-Backspace)
Press Command-D (PC: Ctrl-D) to deselect. I’m also going to lower the Fill opacity of the Halftone layer to around 30% so the contrast is less harsh.
Step 10
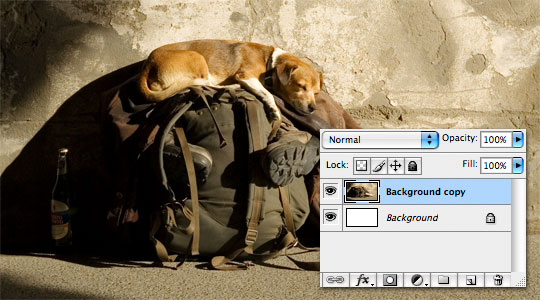
Ok, now that you’ve got the technique down, lets try some other things. Below I’ve opened a photograph, duplicated the background layer which contained the photo and then filled the original background with white.
Step 11
Using the Rectangular Marquee tool (keyboard shortcut M) I drug out a nice rectangular selection. (*note: For this example I’m not going to be expanding or feathering the selection.)

Step 12
Now press Q to enter Quick Mask Mode, apply the exact same Color Halftone effect as before (*note: You can press Command-F (PC: Ctrl-F) to quickly apply the last filter you used.), then simply press Q again to exit Quick Mask Mode.

Step 13
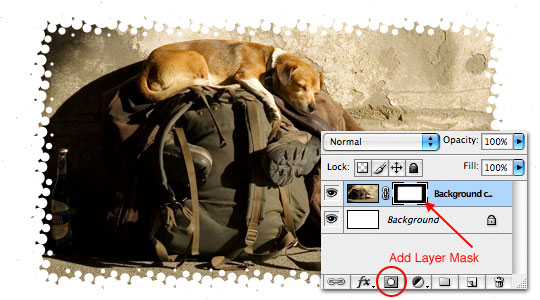
Now instead of filling the selection with color, lets press the Create Layer Mask icon at the bottom of the Layers palette to convert the selection to a Layer Mask.
Step 14
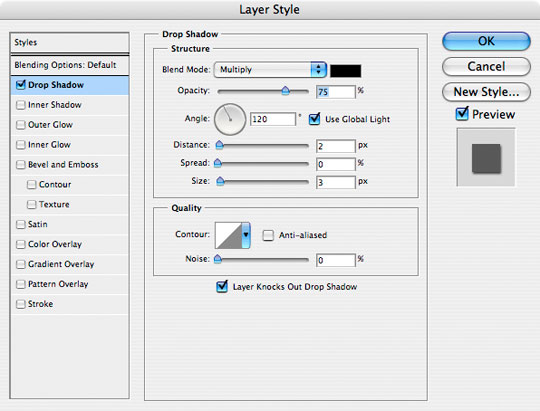
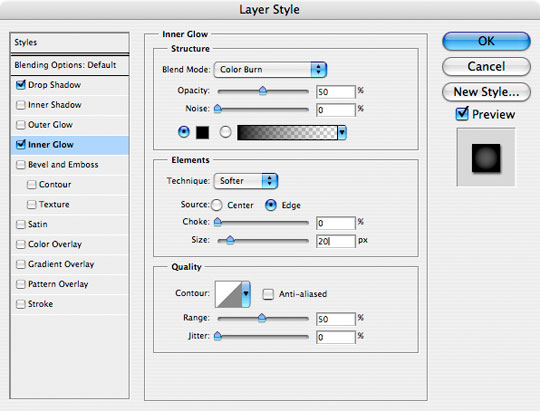
Add a little Drop Shadow and an Inner Glow with some creative settings…
Step 15
And you have a creative little edge effect.

Step 16
Try it around text! In this example I used the expand and feather technique from the first exercise.

Step 17
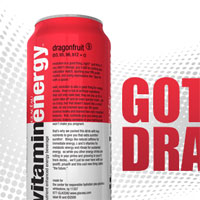
And for my final example I created a Quick Mask with a Reflected Gradient from the center out, then used the Free Transform with Warp turned on in order to bend the halftone into the shape you see in the final image.
(*note: Because of the broad nature of this tutorial I haven’t included a file for download.)

Lesson Files + Additional Resources
There are no file downloads or additional resources for this Photoshop tutorial
Tell Your Friends
More in Graphic Design


15 Responses to An Exercise In Quick Masks and Color Halftones
Chad
March 28th, 2008 at 6:19 pm
Cool effect. I never knew quick masks even existed until this tutorial!
Sacha
March 29th, 2008 at 1:01 am
Even though I knew about all of these things separately, it’s nice to see your workflow and how you use these techniques ! thanks for another great tutorial !
DuDe
March 29th, 2008 at 6:06 am
Nice job man! Thanks for this smoooth tutorial! :)
tonik
April 3rd, 2008 at 8:26 am
great site!you are hellping a lot!thanks.can you add more text tutorials:)
Yan
April 7th, 2008 at 8:41 am
Please explain in detail instructions the last effect of how to create a Quick Mask with a Reflected Gradient (Vitamin Energy-Got Dragon?)
Thanks a lot
Gabe
April 18th, 2008 at 5:11 am
Yan – you can use a gradient layer style to get the gradient effect (right click on the layer, then go to blending options, check off the gradient overlay box, then play with the colors/opacity.) It also looks like that image uses some sort of distort filter, my guess is wave (from the filter menu, go to distort, then play with those options until you get something you dig.)
Love the site, just stumbled onto it today, glad I did!
HERO
April 18th, 2008 at 7:28 am
Yan, the reflected gradient is the 4th of the 5 gradient option icons in the gradient options bar and I drug the gradient from the horizontal center line of the stage to the top, creating a gradient that is solid through the middle and then thins out towards the top and bottom. I then applied the halftone and used the Free Transform tool with Warp turned on to tweak the effect.
HERO
April 18th, 2008 at 7:28 am
Gabe, thanks for the contribution. I’m glad you found the site!
Marcos
April 22nd, 2008 at 2:27 pm
Great tutorial, I have learned a cool effect working with it. A friend told me about the site and I think I will be rounding here a lot of my spare time. I have exactly the same operative sistem and version of the software, so the photos helped me a lot. You?Ǭ¥re very meticulous. Sorry about my english ;-)
greetings from Spain
HERO
April 22nd, 2008 at 2:29 pm
Marcos! Welcome to the site! I’m psyched to have a Spaniard in the house!
ChampionSound
July 22nd, 2008 at 9:25 pm
Hey Hero, cheers too from New Zealand. just found your site the other day and lo and behold i’ve got exactly the project that requires the fine advice you’ve provided.
thanks again!
andy
Holly
February 28th, 2009 at 3:43 am
Sweet as. Hero, I’ve learnt so many new shortcuts and techniques from your site, I bow to you. Thanks heaps man
julie
March 17th, 2009 at 8:54 pm
thank you so much!! this was super helpful and exactly what i needed!
Scott
March 23rd, 2009 at 5:34 pm
I did the happy dance. Thanks Hero!
evilkitty75
November 20th, 2009 at 6:57 pm
thankyou u taught my to allign the pic to centre i had so so much trouble with this in the past so thankyou man