


Frayed Denim Patch With Stitches
In this Photoshop tutorial we will be creating a denim textured patch with stitching. This technique uses the Fill command, a few artistic filters, Wind and a few basic layer styles.Step 1
Hey gang! Today’s tutorial is a little bit on the digital scrapbooking side, but there are some really great tricks along the way, so lets open up a new document and get started. Mine is 540×300 at 72ppi.
The first thing we want to do is create the denim background which we’ll be working with. Now, we could go through the hast le of creating layers of fibers and complex patterns, but Photoshop has a great denim pattern built right in.
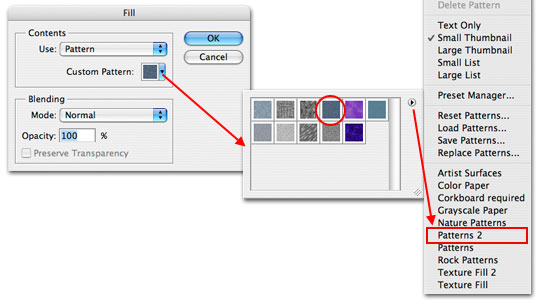
Create a new layer and from the main menu choose Edit>Fill which will bring up the Fill dialog box. Choose Pattern from the Contents option then select the swatch to open the Custom Pattern selector. There is a little arrow in a circle at the top right corner of the Custom Pattern Selector and if you click it a nice long menu of options appears. The pattern set we want to load is called Patterns 2. You can either append (tack these patterns onto the bottom of all the custom patterns you’ve already got loaded), or you can just click OK to replace all the current patterns with this new pattern set.
With the pattern set loaded, find the pattern called Denim and click OK.
Step 2
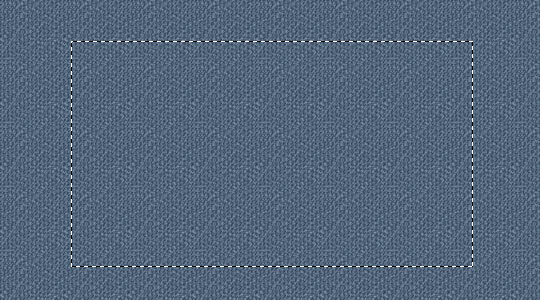
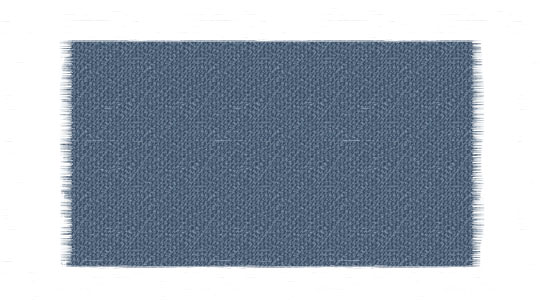
If you did everything right you’ll have a stage full of denim.
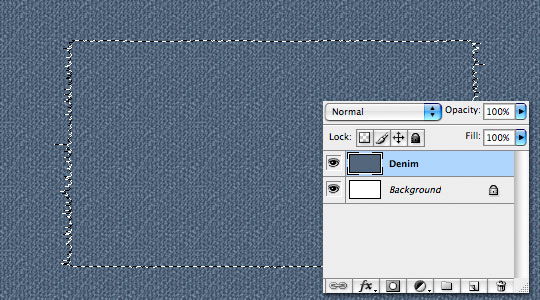
Press the M key to switch to the Rectangular Marquee tool and drag out a selection where you want your denim patch to live.
Step 3
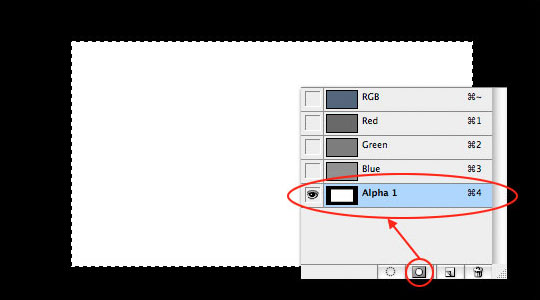
With our selection made, lets now switch over to the Channels tab in the Layers Palette. (*note: If your layers palette isn’t visible choose Window>Layers from the main menu.)
Now lets click on the little button at the bottom of the Channels palette called Save Selection As Channel. This will create a new Alpha channel from our selection.
Click on the new Alpha 1 layer then Press Command-D (PC: Ctrl-D) to deselect.
Step 4
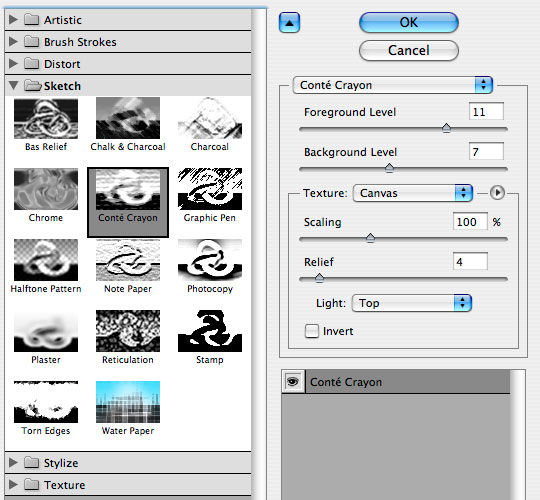
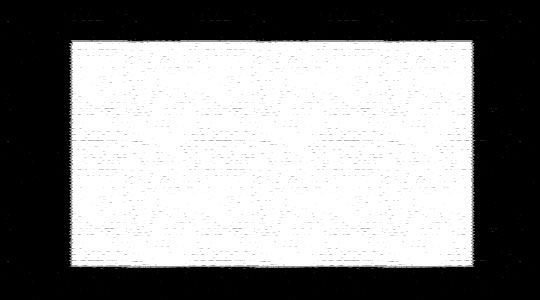
Now we’re going to add a few filters to this Alpha Channel. The first effect will give us a little bit of edge grunge. Choose Filter>Filter Gallery to pull up all the available filters. From the Sketch styles choose Conte Crayon with the following settings.
Step 5
If you followed along like a good little monkey your Alpha Channel should now look like this.
Step 6
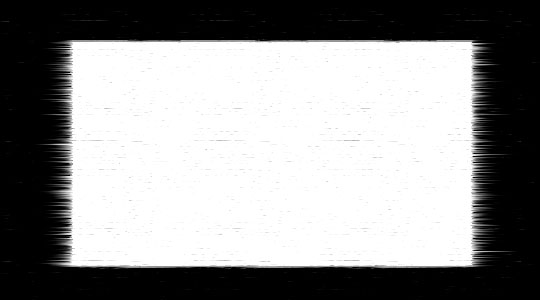
Now it’s time to add the second filter to our Alpha Channel. From the main menu choose Filter>Stylize>Wind to bring up the Wind options dialog where you will choose Wind and From The Right from the options and click OK.
Now repeat this step except this time choose From The Left which will give you this final result.
Step 7
Lets create a selection of our Alpha Channel by holding down the Command (PC: Ctrl) key and clicking on the layer thumbnail of the Alpha 1 Channels Layer.
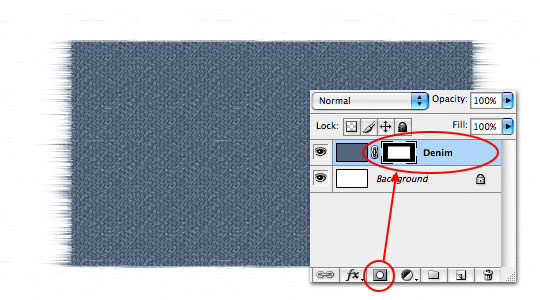
Switch back to the Layers tab in the Layers palette and choose the Denim layer we created earlier.
Step 8
Create a Layer Mask of this selection by choosing the Create Layer mask icon from the bottom of the Layers palette (*note: it’s the one that looks like a rectangle with a circle inside it.)
Step 9
Now with the Layer Mask selected, use a black brush to paint down the right and left edges where the Wind filter was applied until the ends look more like realistic threads fraying from the piece of denim. Remember that the edges don’t have to be even.
Step 10
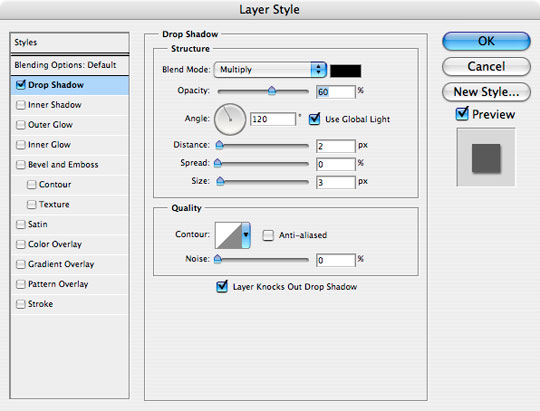
Add a slight drop shadow to this layer.
Step 11
We will now color the right and left edges white to create the look of fraying thread.
Create a new layer and call it Edges. If you hold down the Option (PC: Alt) key and click and drag the layer mask from the Denim layer up to the new Edges layer, it will make a copy of that Layer Mask on the Edges layer.

Step 12
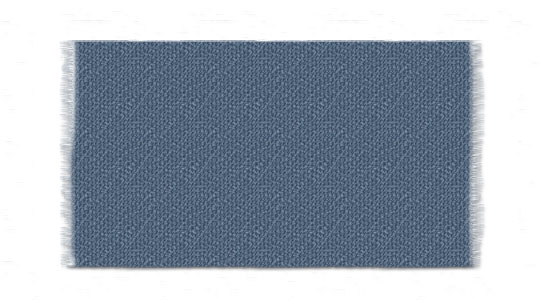
Making sure the layer thumbnail (and not the Layer Mask) is selected by clicking on it, use a white brush to paint along the edges of the fabric until your edges look like the ones below.
Step 13
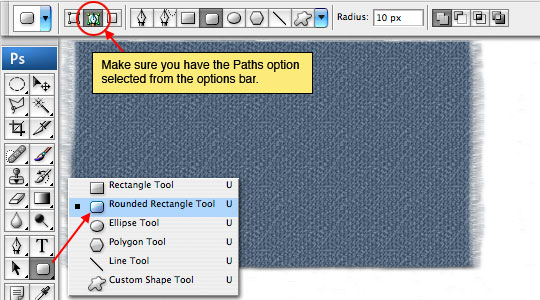
Create a new layer above the Edges layer called Stitches. Press U to select the Custom Shape tool and from the fly out menu choose the Rounded Rectangle Tool. Make sure that the drawing style is set to Paths in the Options toolbar as shown below.
Step 14
Drag out a nice sized path for our stitches to follow.
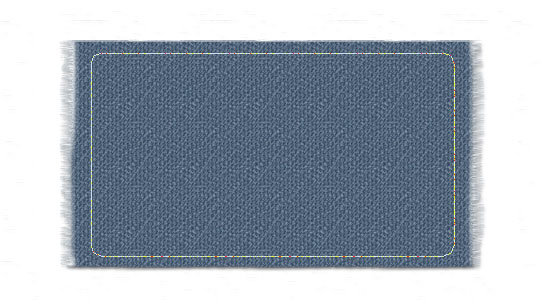
Step 15
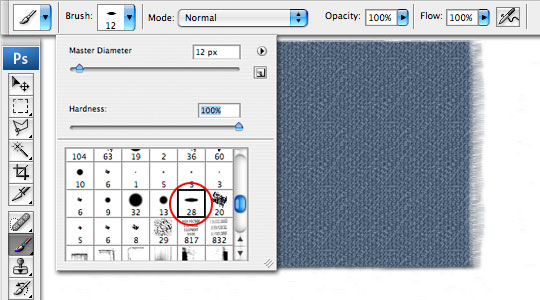
Press the B key to invoke the Brush tool and choose the brush called Charcoal Flat from the Brushes menu. Set the Master Diameter to 12px and the Hardness to 100%.
Step 16
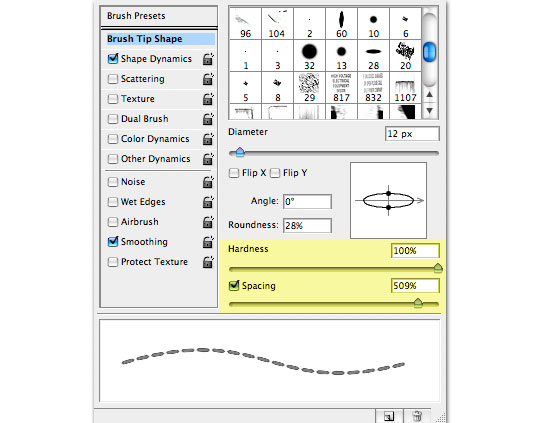
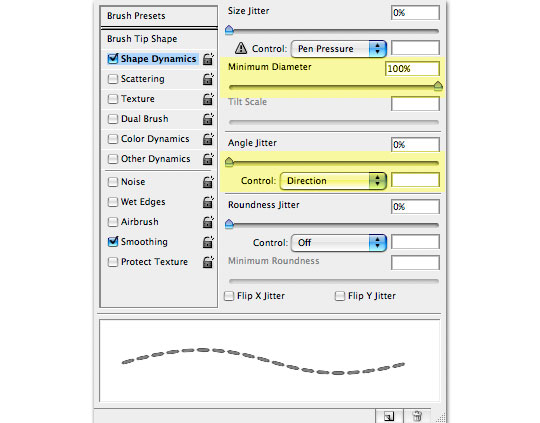
Open the Brushes window from the main menu (Window>Brushes) and make the following adjustments.
Step 17
Now that the brush is all set up, press the P key to invoke the Pen tool and Control-Click (PC: Right-Click) on the Rounded Rectangular path we placed on the stage in Step 14. From the menu that pops up choose Stroke Path and then choose Brush. Because of the settings that we made in Step 16 when we stroke the path with the brush it places perfectly spaced stitches which follow our path exactly.
If you wish to hide the path at this point simply press Command-H (PC: Ctrl-H).

Step 18
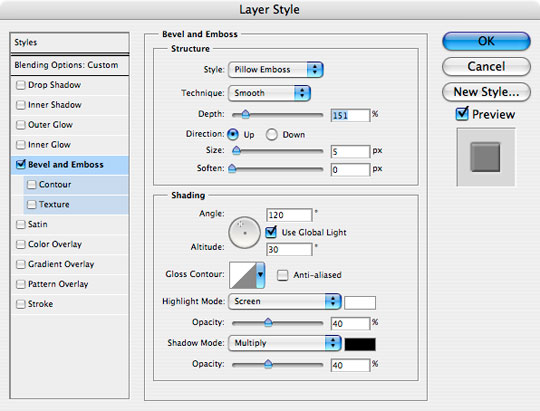
Add a slight Bevel and Emboss layer style with the following settings and then drop the Stitches layer Fill opacity down to 70% to tone down the stitching a little bit.
Step 19
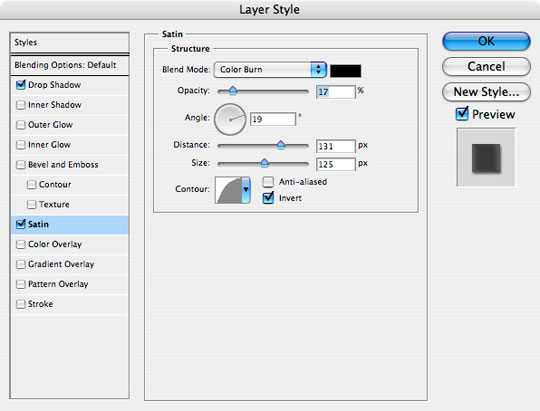
The last thing I might do is go back to our Denim layer and add a Satin layer style to give the denim a little more realistic tonal variation like this:
Step 20
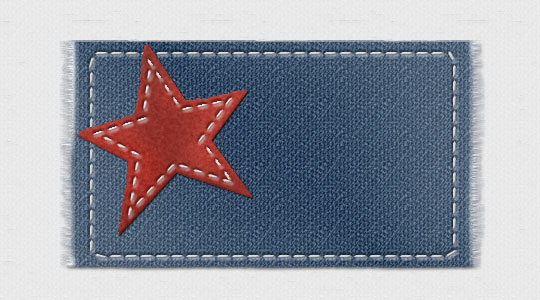
And there you go kids! Another fun Photoshop tutorial and a few more tools you’ve now got a little experience with. Great Job!
Lesson Files + Additional Resources
Download the free .PSD file and other lesson files Right Here.
Tell Your Friends
More in Graphic Design


53 Responses to Frayed Denim Patch With Stitches
quiet0ne
May 20th, 2011 at 11:13 am
Thank you so much for this tutorial! I’ve been using Photoshop for years and never knew about the stroke path option. What time this knowledge will save me!
Shaik
June 8th, 2011 at 2:59 pm
This is a fantastic website with step by step explaination of pratical examples. I really love your tutorials. Thanks for all you are doing for us.
suw@i
July 25th, 2011 at 8:49 am
I really love this fantastic website. Thank you for tutorials.